Enhancing AVD: Session Host Configuration & Auto Scaling
In this blog post we’ll discuss the latest developments in AVD majorly on the host pool and Auto Scale related changes which will make a significant change to how AVD functions.
We’ll not do step by step guidance around the entire AVD deployment, though this is more about understanding what these changes are and what benefits it brings to AVD administrators. Hence we’ll only cover some step-by-step instructions around the new topic discussed in this blog, for example AutoScale configuration, using auto scale policy, session host configuration etc.
Let’s start with Session Host Configuration.
Session Host Configuration:
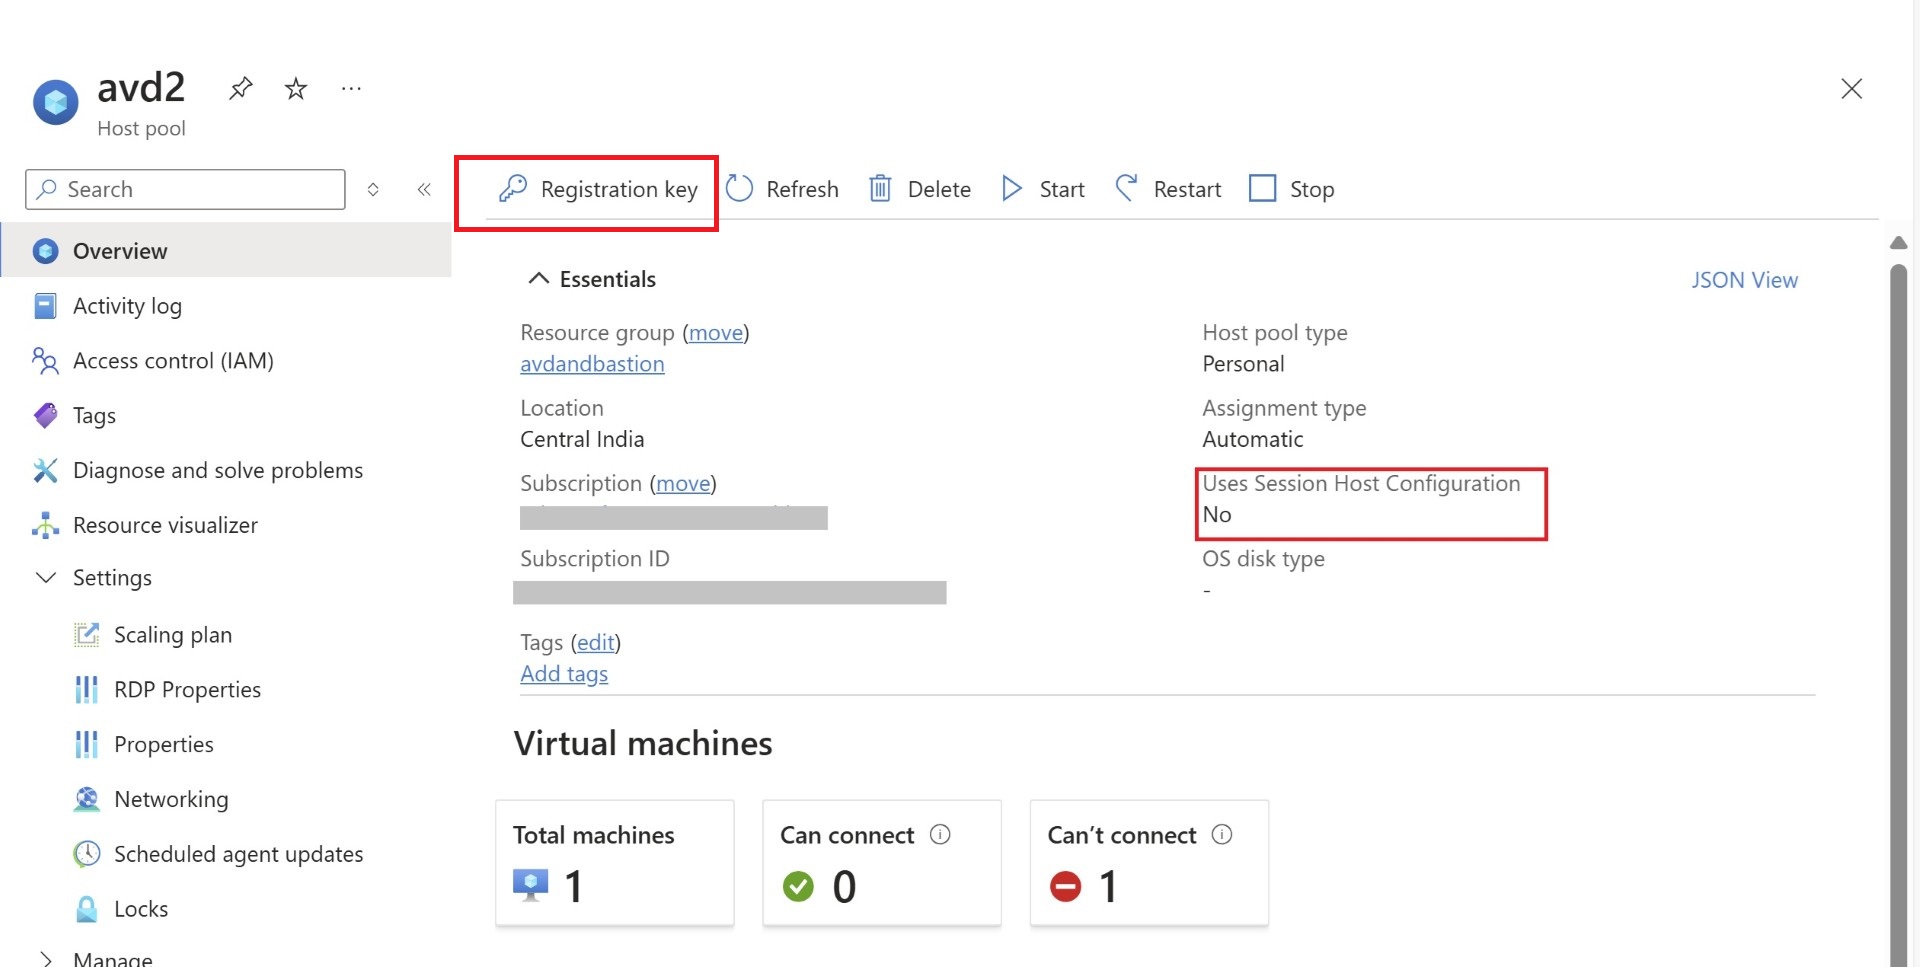
Since ARM days of AVD deployment, once you deploy a host pool. It was a static deployment. Why static? Because the host pool configuration was not maintained as an object which could have been modified. Because of which there were challenges in operational tasks such as.
- Adding a host: If you wanted to add host to existing host pool. you need to get the registration key, and after that, it was all UI-based deployment. You’ll need to download the agent, register that with the host pool and then it became part of it. there was no PowerShell cmdlet or other automation through which it could be achieved..
- Update existing image: Similarly, the image update to existing host pool was also a tedious approach, if you wanted to roll out new updated image you either have to first create registration key, and then do the same process of addition of new host to existing host pool and then turn on the drain mode. So that users are not allowed to log in to existing machines and there was no option to schedule the update. we treated the host pool like a pet. Machines are treated with care by patching, maintaining etc.
Introducing session host configuration. Now the details of the host pool configuration is saved as an object and then there is a session host policy, where every configuration of host pool is defined as parameters. If you want to modify any of the settings of your host pool you can modify those settings easily.
The benefits you get out of the session host configuration is, you’ll be now able to modify the number of host based on your requirements and pass on the image through which the new VDI machines will get added to your host pool. Also now if you want to modify your image then you can easily do this configuration and also schedule this update in off-hours or over weekend.
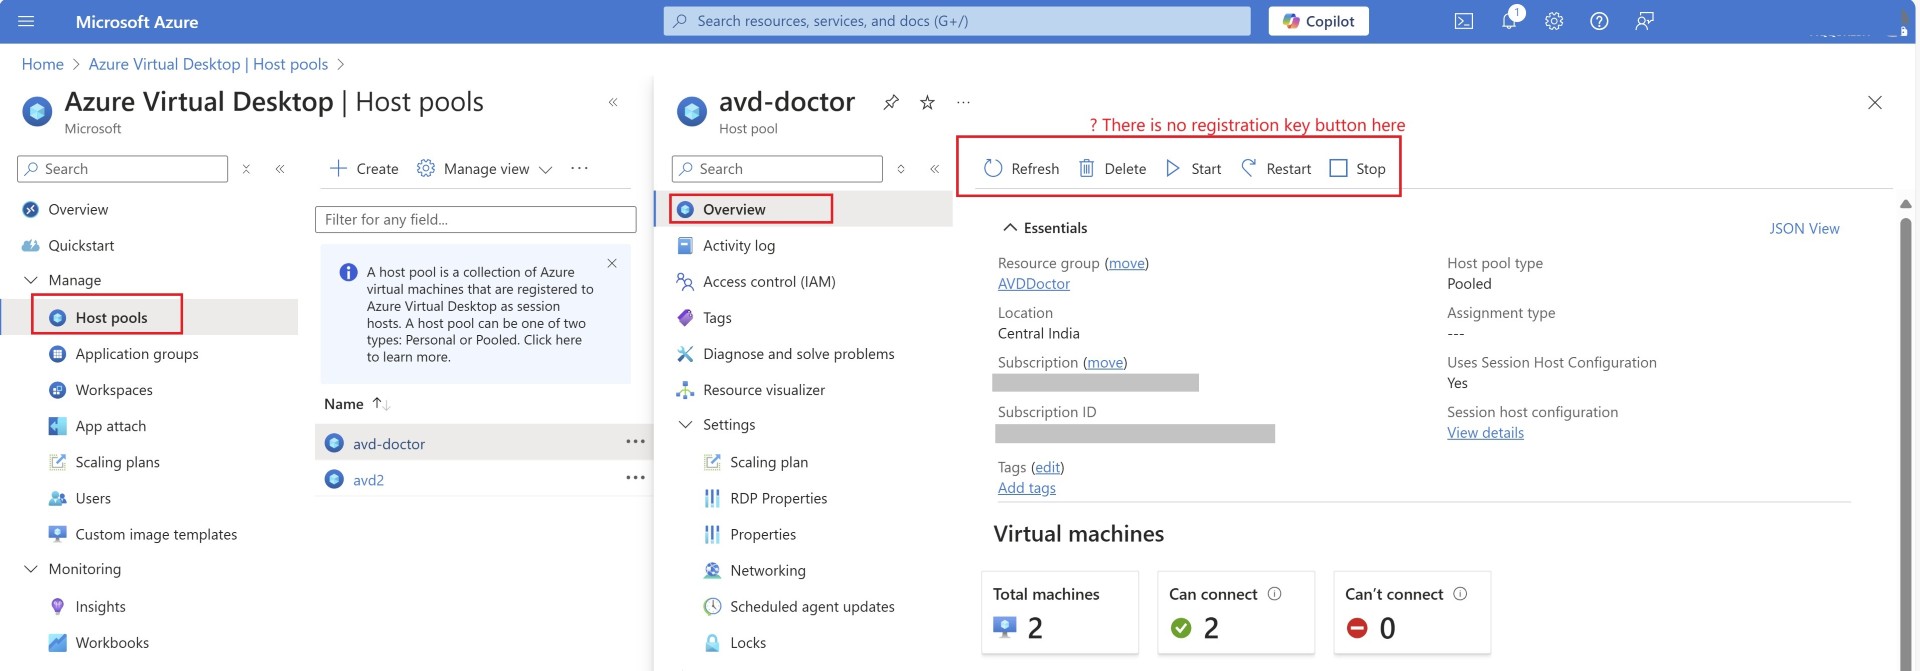
Because of this, you will not see the registration key button when you open existing host pool which was deployed with session host configuration.
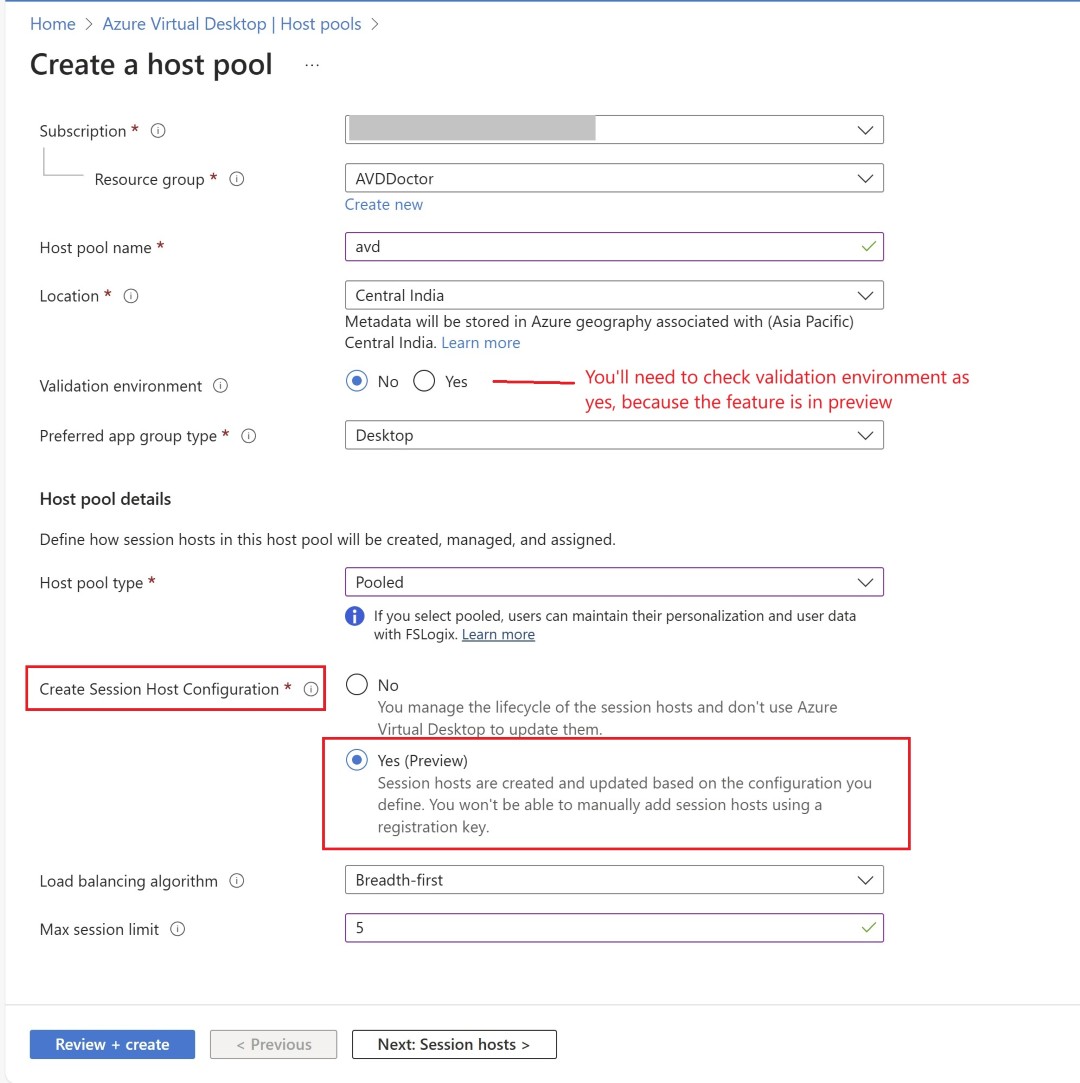
- Deployment steps: You’ll need to deploy new host pool and select the preview option of session host configuration.
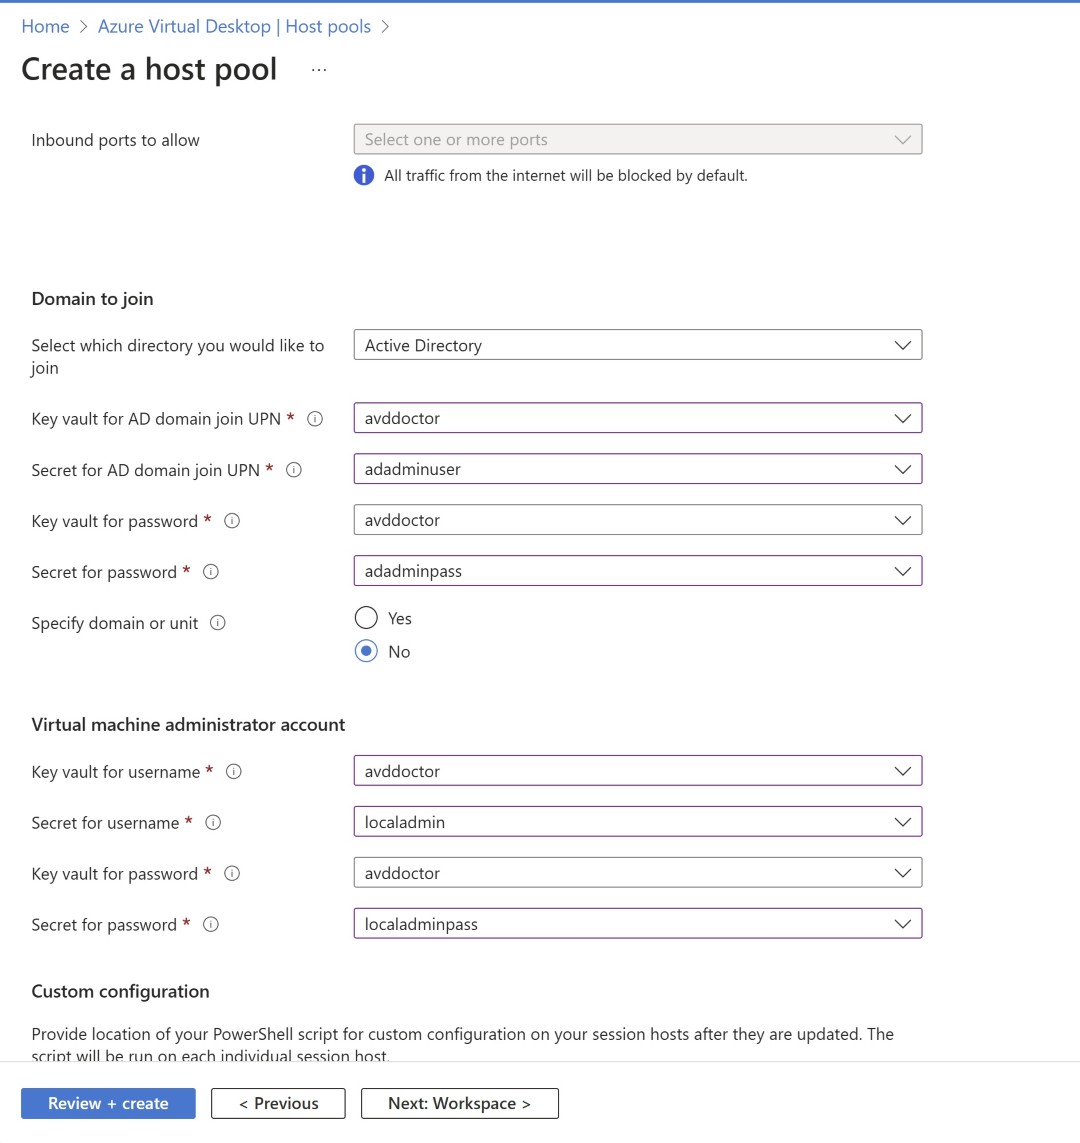
Also now, the setting is updated, the page where you used to provide the credentials of the AD admin, local admin, and their passwords it will all be stored in keyvault and AVD Service principal will fetch the username and password from the AKV.
Once you open host pool, you’ll see an option to edit the session host configuration.
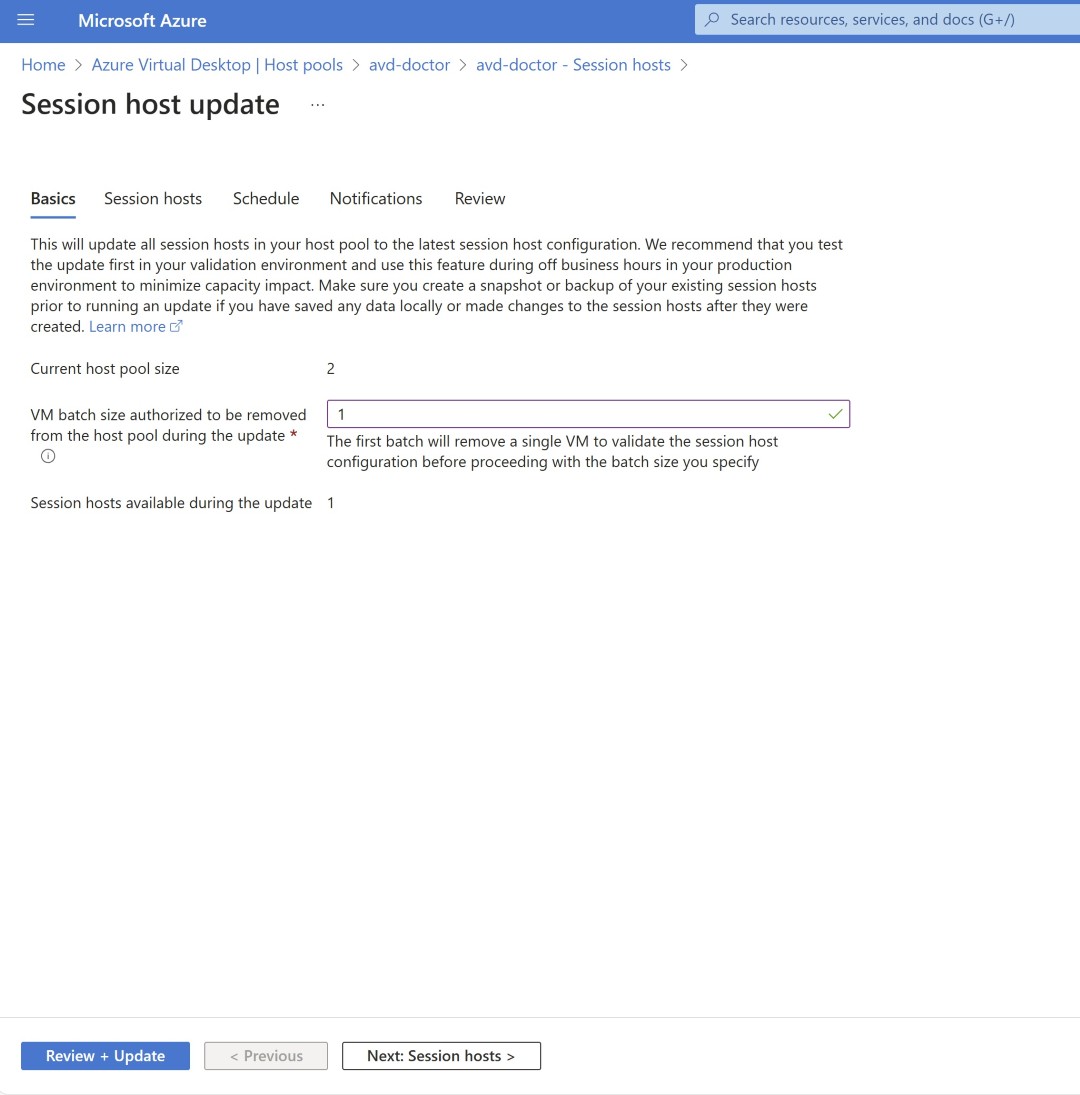
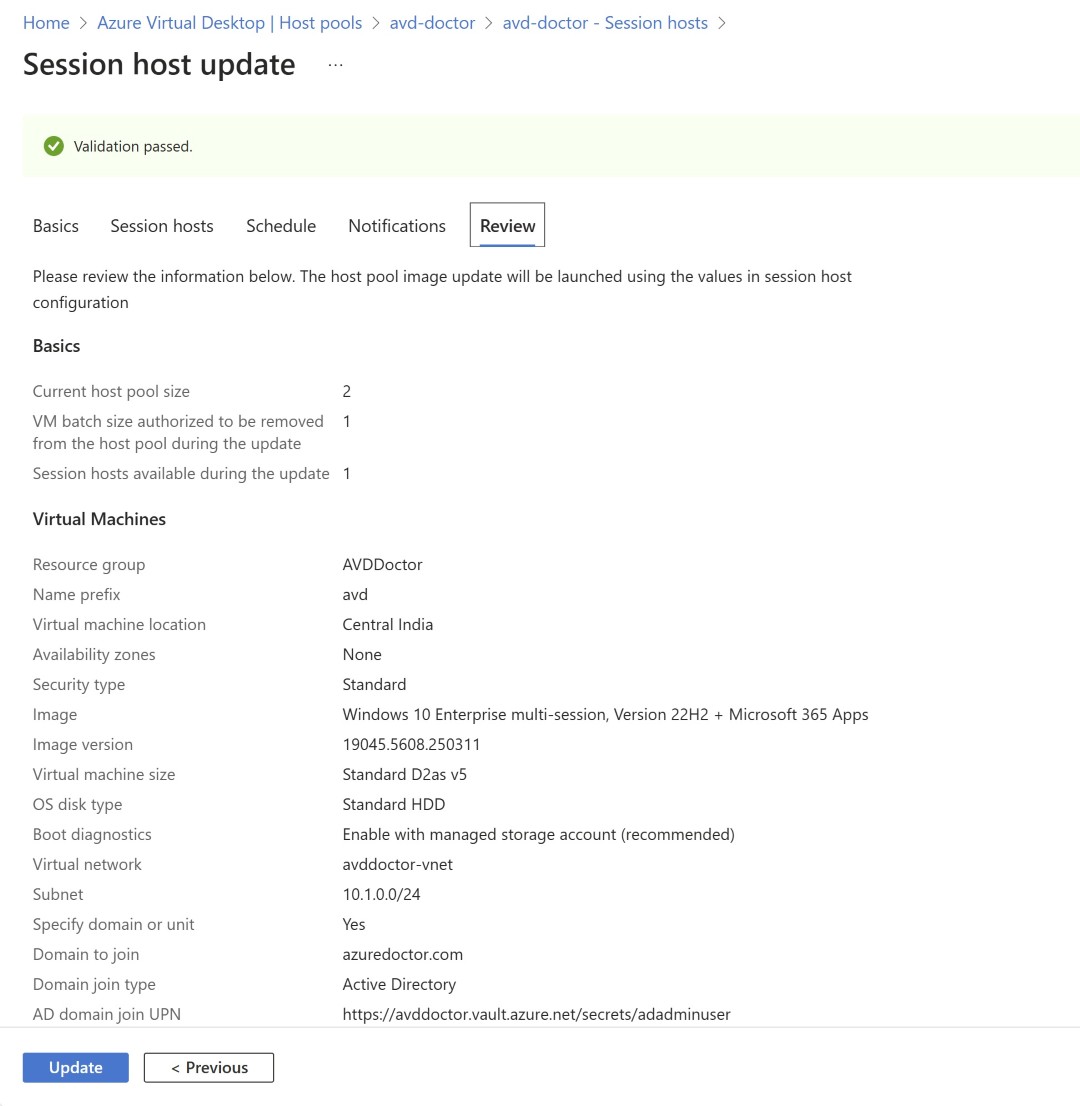
Specify the number of VDI machines that should be removed during the update process.
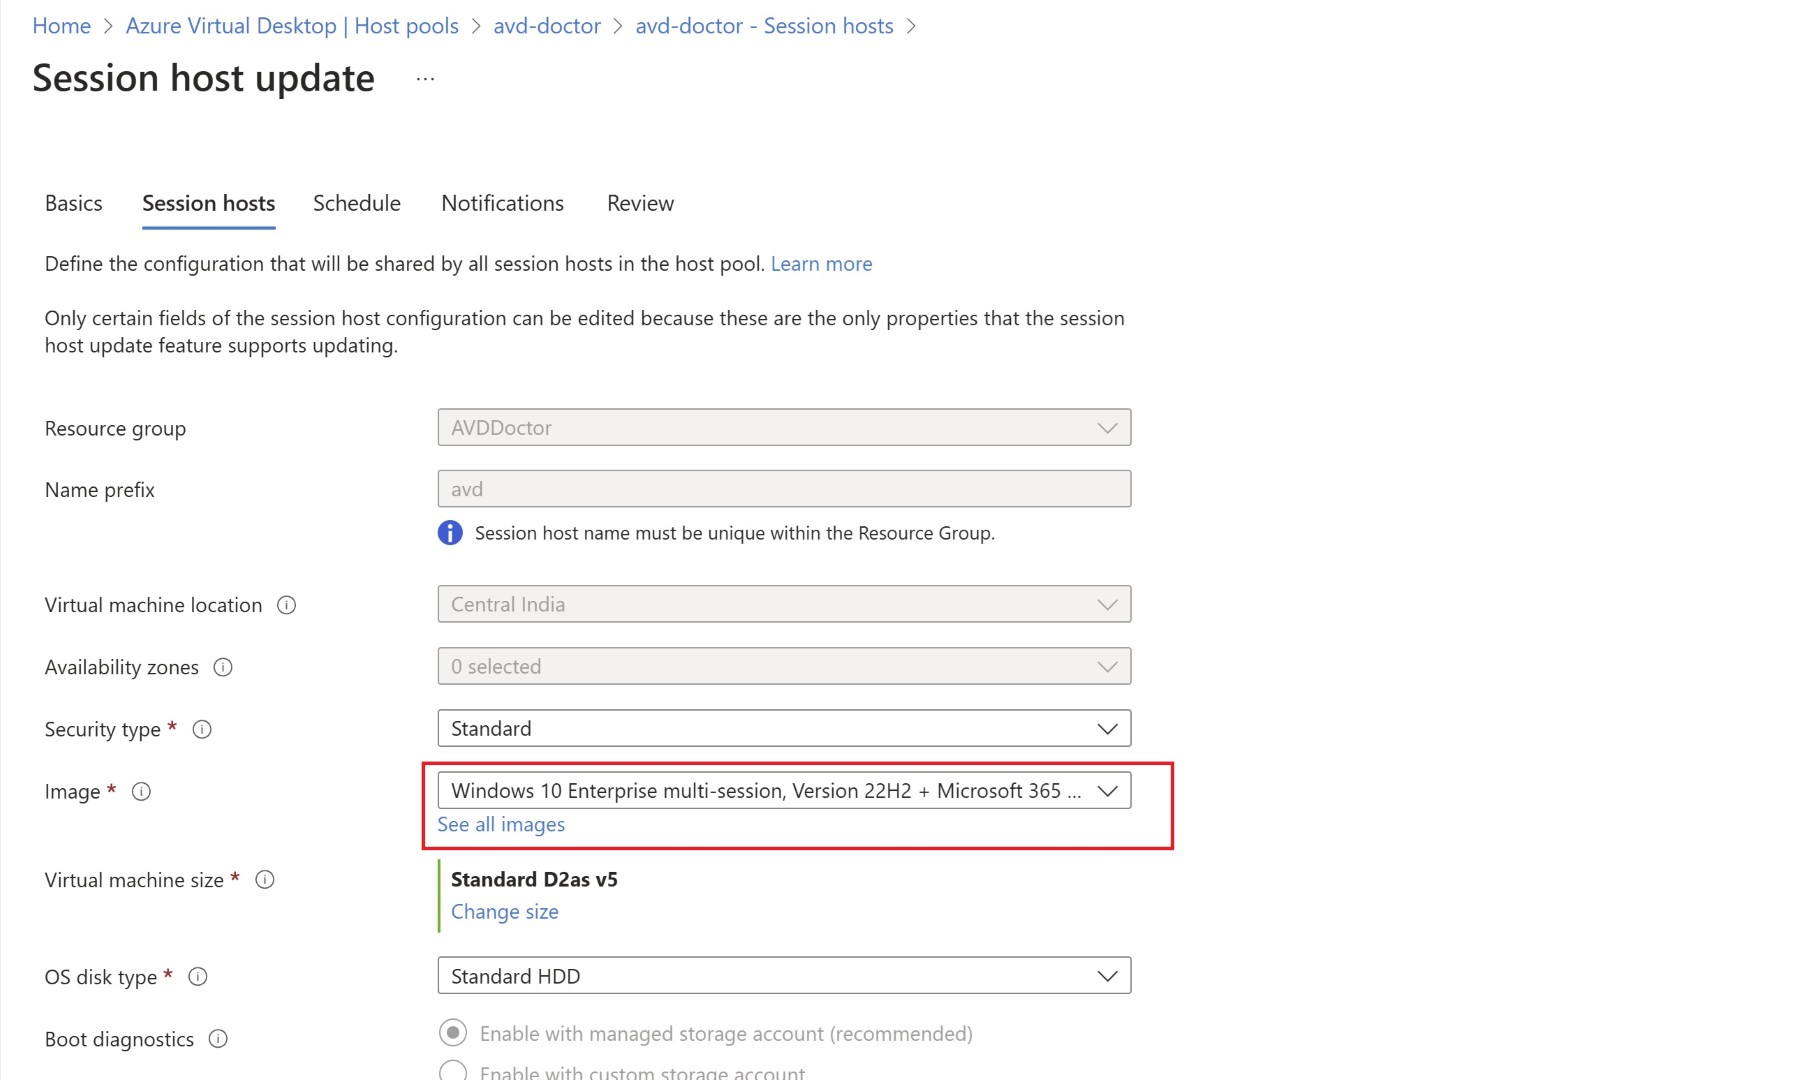
Then specify the new image. (remember this stage, we’ll discuss this step in the image template section)
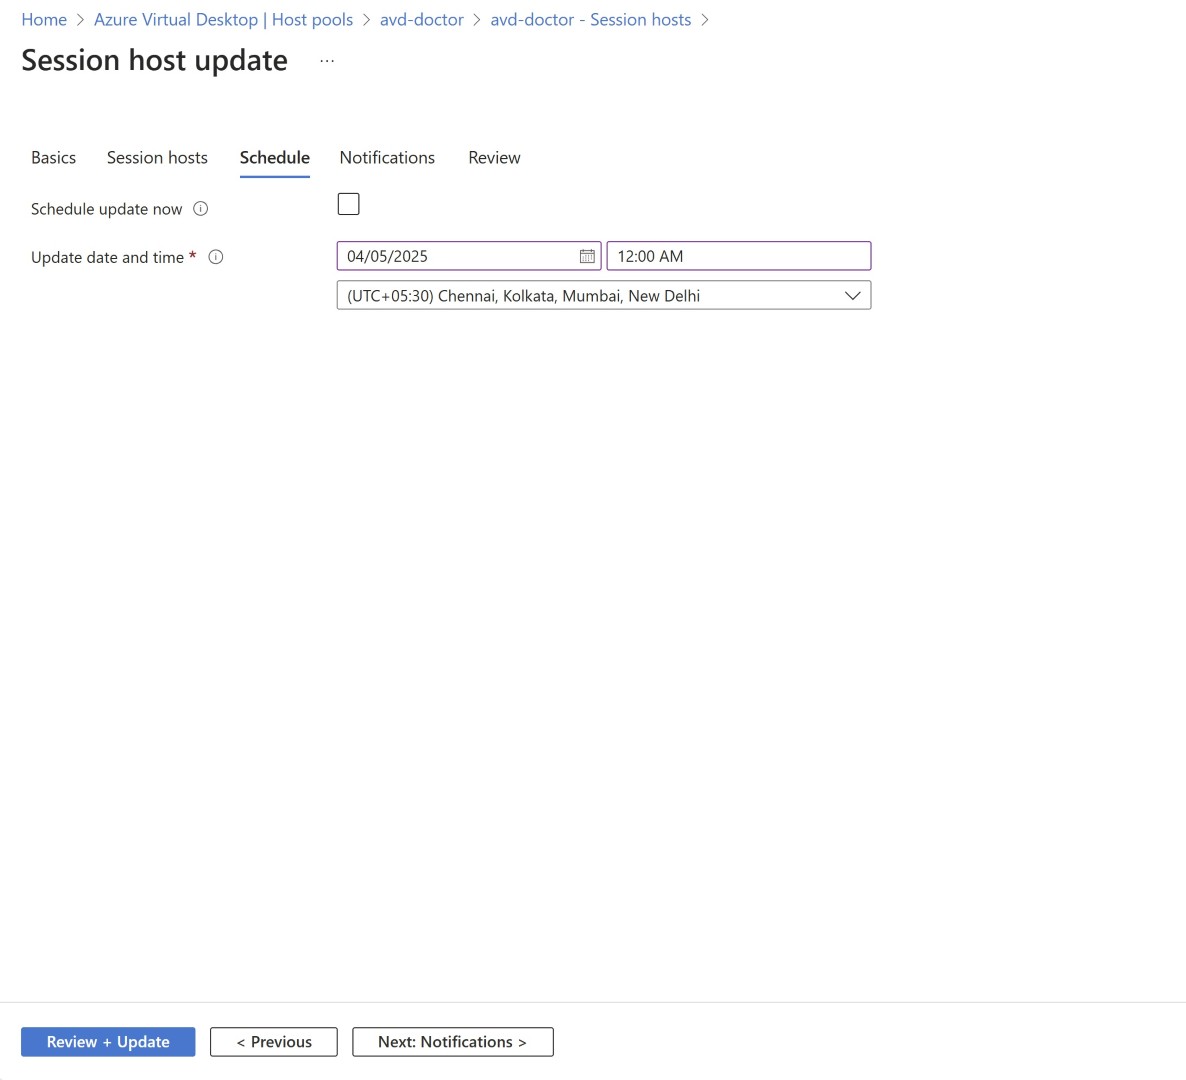
Now you can update the image now, or you can schedule this over a weekend.
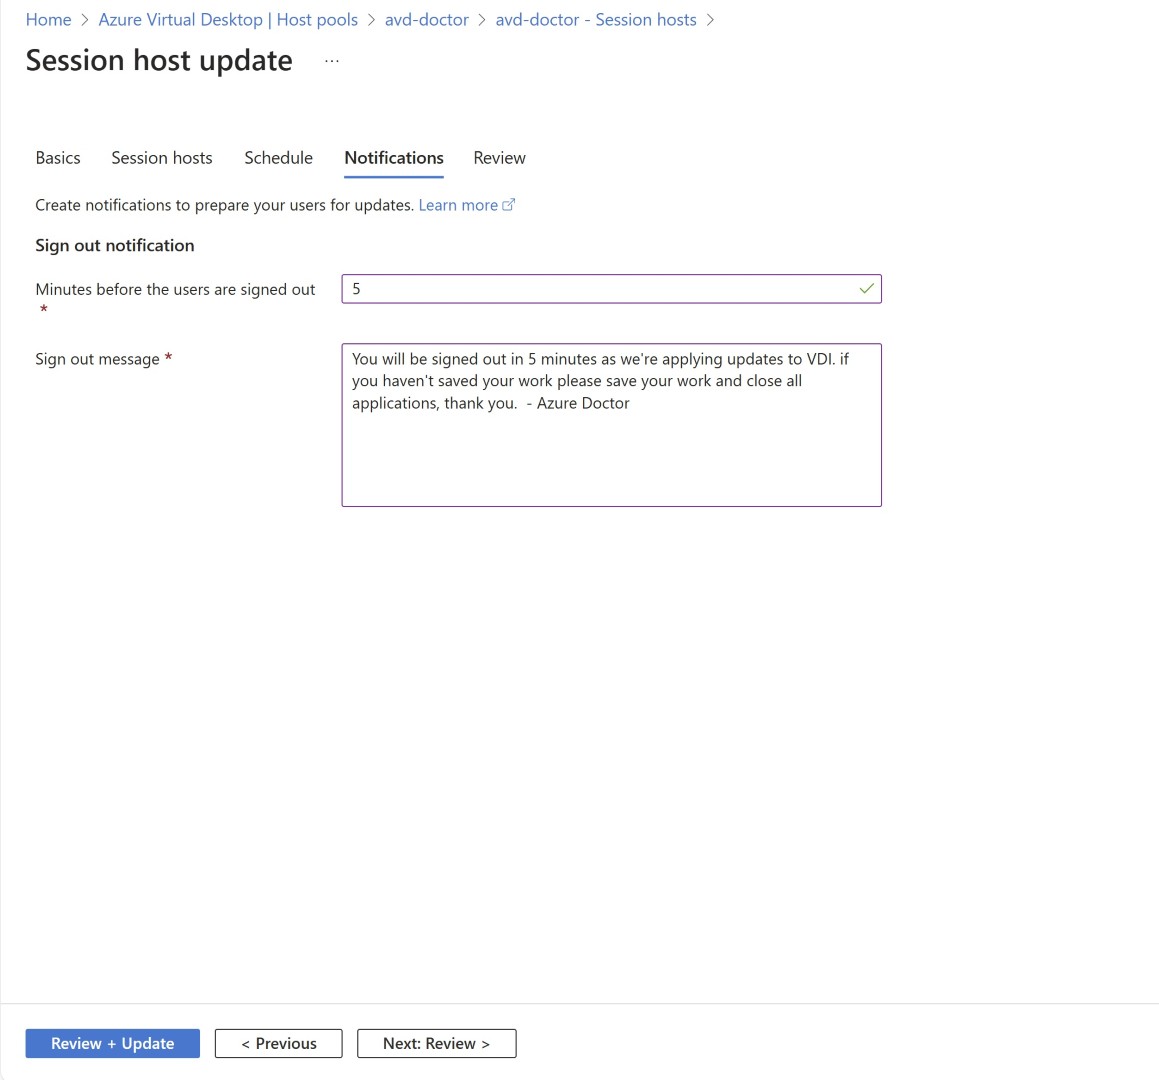
Deploy the final update to session host config.
Please note: AVD service principal which is present in your tenant should have reader access on the Resource group where AVD is deployed along with VNETs etc. Also it should have Keyvault Secret user access on the Azure keyvault where you’ve added Admin user and password.
More of the pre-requisite mentioned here:
For Powershell cmdlet to perform all the steps you can check below link.
Custom Image Template:
Now that the host pool configuration is dynamic with the new session host config setting, this little bit old feature of Custom Image template makes more sense. Though this is not new, I wanted to reiterate its importance in the whole scheme of things because we’re talking about image and this entire blog affects the host pool topic significantly.
With custom image template via the UI you can modify the template and pass the config to image builder service which will build the image and then save it in the compute gallery. Once it is saved, the same can be passed on to the session host config policy during the update of the host pool. Know how you can configure the custom image and churn more images continuously with automation.
https://learn.microsoft.com/en-us/azure/virtual-desktop/custom-image-templates
Auto Scale:
Auto scale configuration for pooled desktop was there since 2022 and it was rolled for personal session host in 2023. Basically it used to turn VMs on and off based on ramp-up and peak hours, which you could specify in the schedule window.
In the backend, the administrator used to deploy the host pool and pre-calculate the count of the VMs present in host pool. And autoscale used to turn on/off VMs based on the settings I just mentioned. Because of the session host configuration setting, it adds another possibility to autoscale setting. How about the VMs being created on the fly based on the schedule you specify and basis on user logon the VMs in host pool are added dynamically.
Yes, this can be achieved now with dynamic autoscaling feature which is in preview.
so there are two types of autoscaling features in AVD.
Power Management Autoscaling: This is the old method which is already GA since 2022 and it used to turn on/off the VMs based on the user login and schedule which you specify. Just turn on/off. And not creation/deletion. we’ll not explore this option in this blog and only focus on the new feature which is in preview.
Dynamic autoscaling: This feature is in preview now, and it is available only for host pool created using session host configuration settings. This autoscaling is based on the same old principal of schedule and user activity however it’ll not just turn on the VMs. It’ll actually create VMs on the fly based on the image you had specified. so the NICs, disk, and other resources will be created when the scaling policy kicks in. which helps you in overall cost saving of the OS disk. Because it actually doesn’t exist if it is not required.
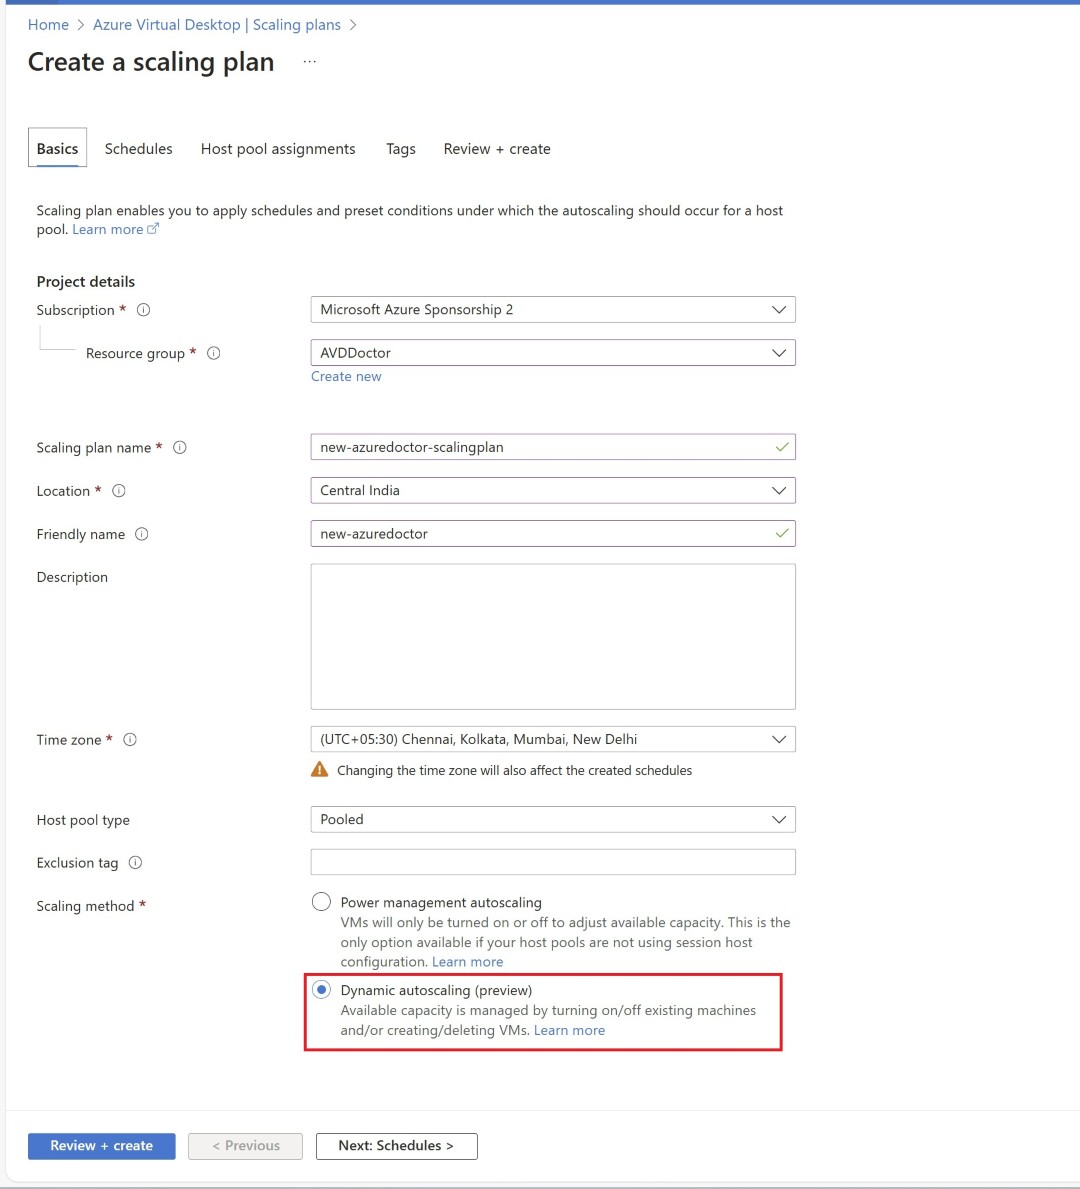
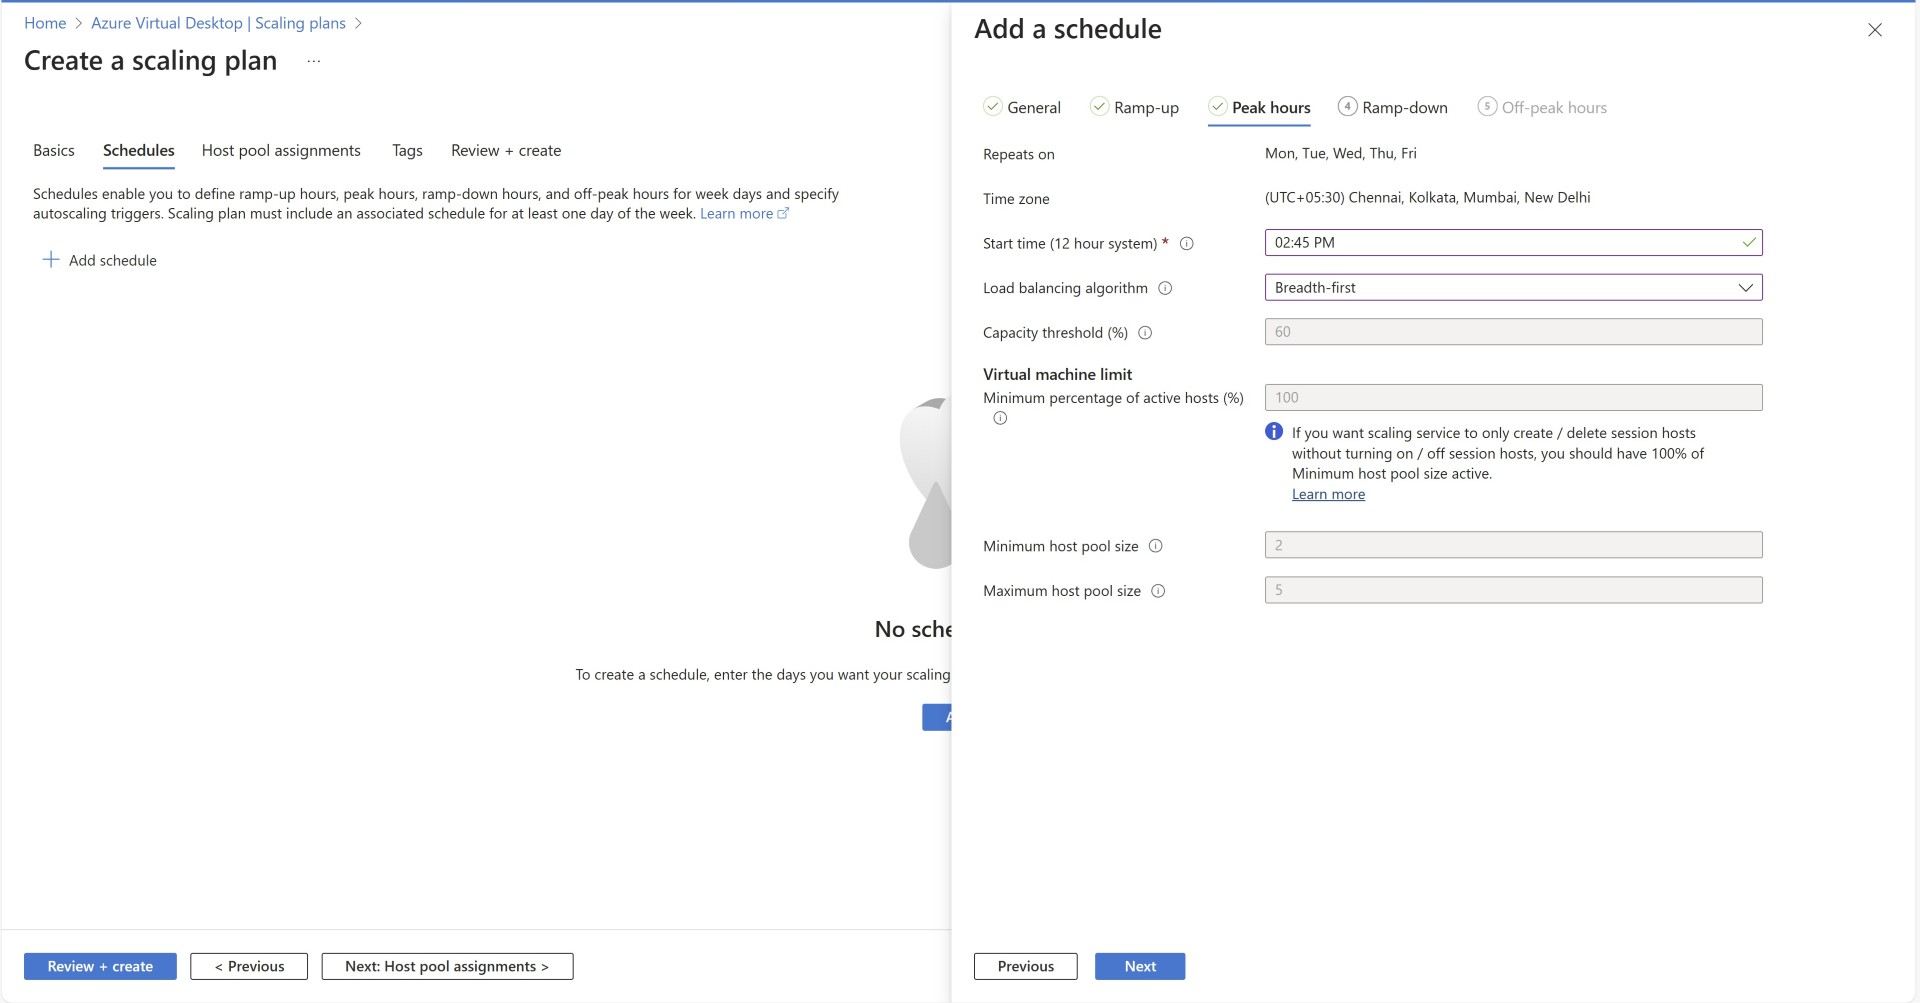
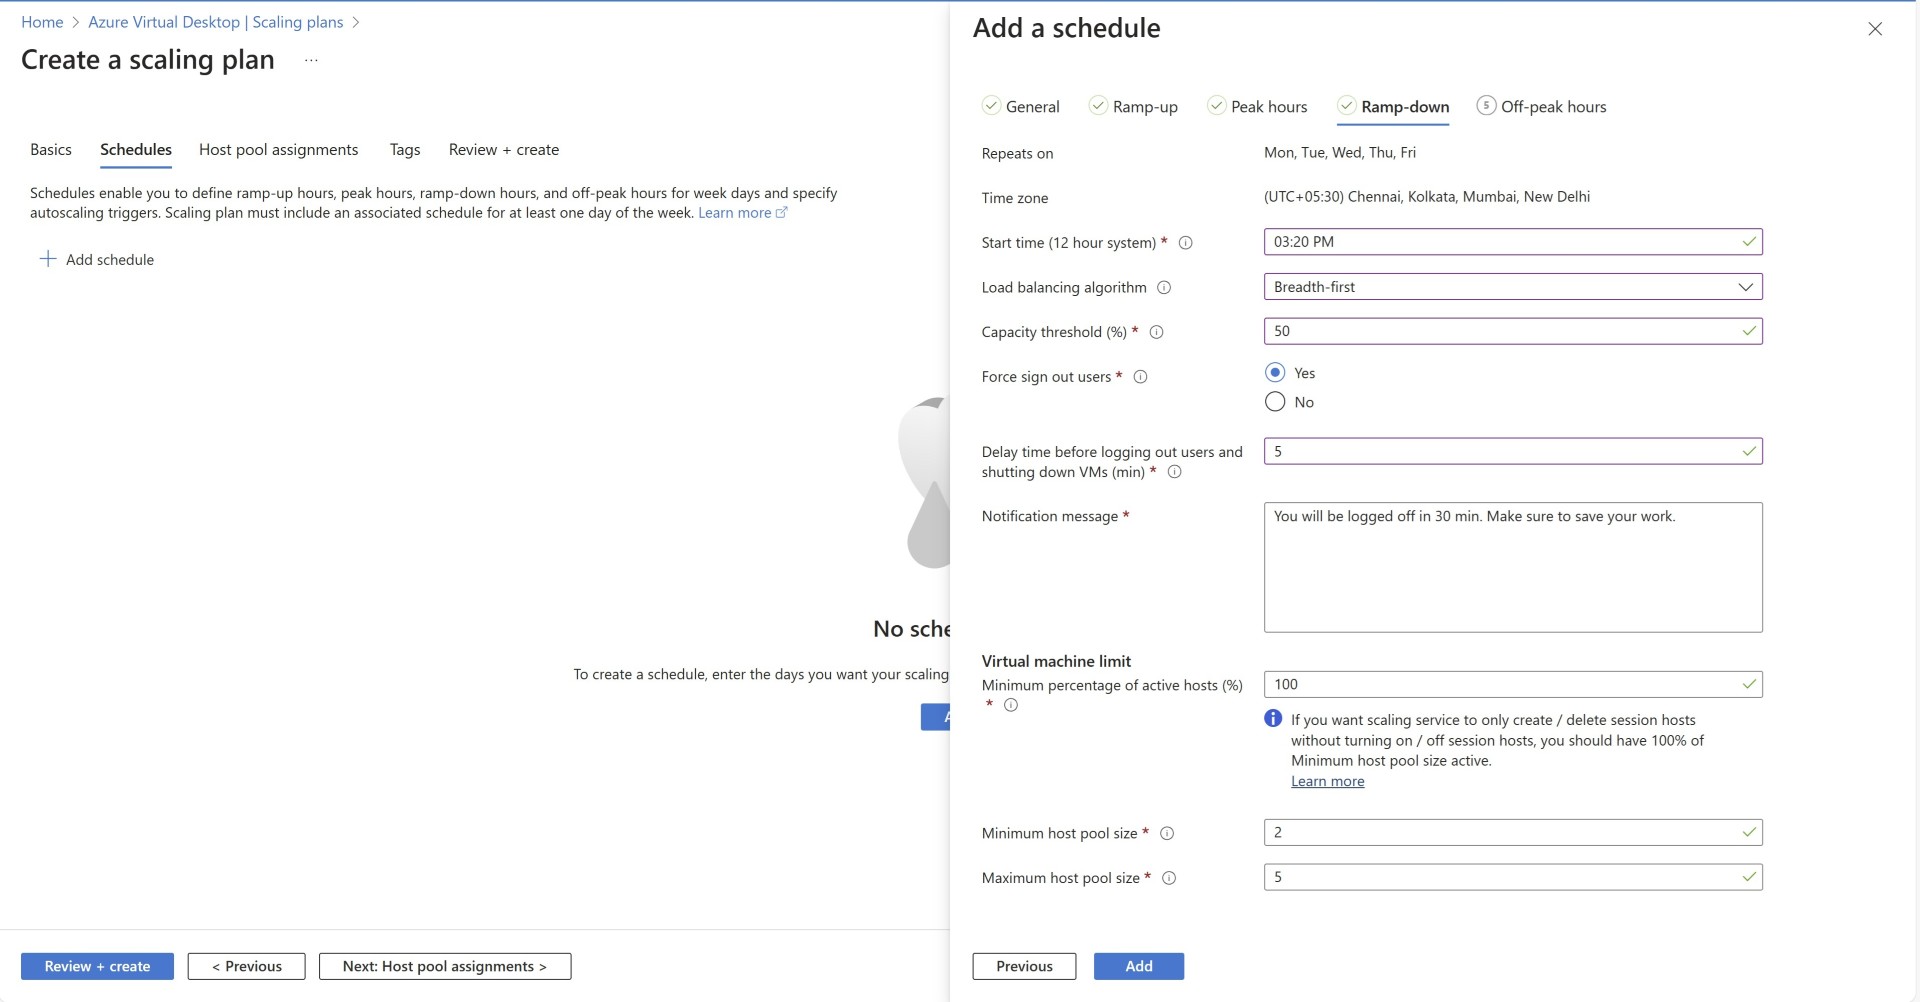
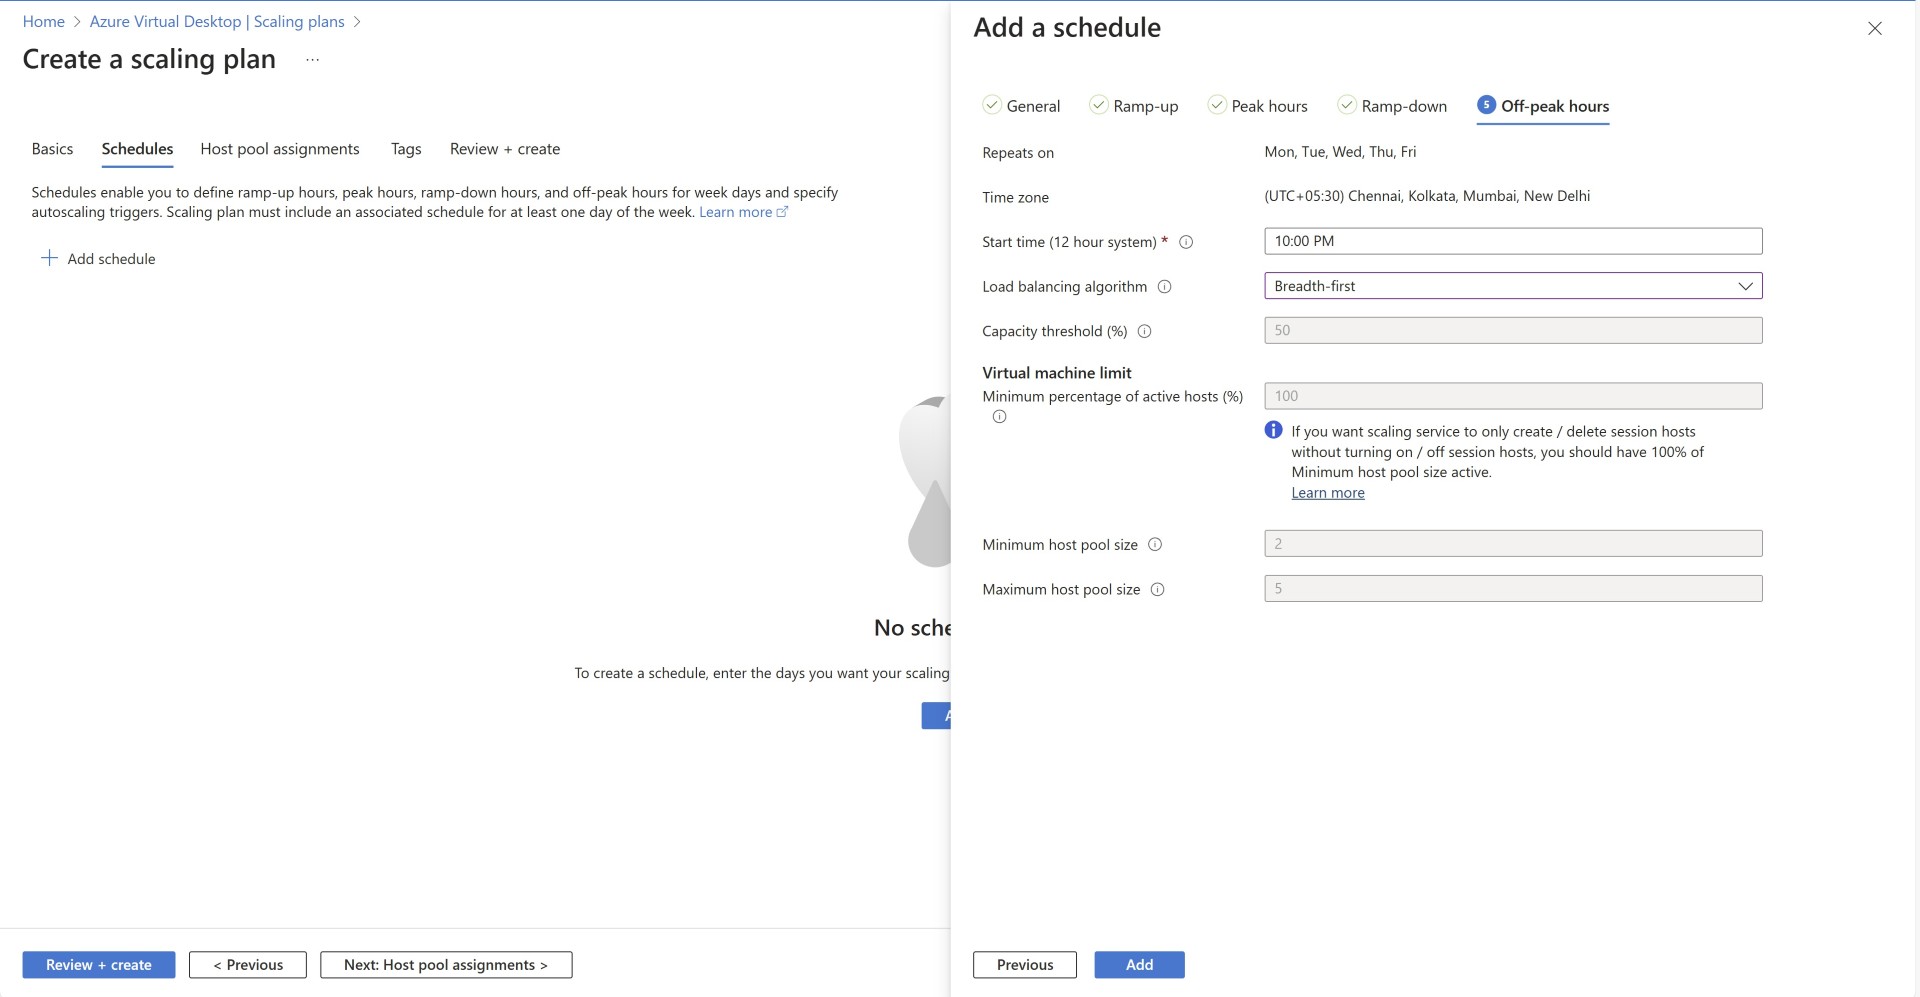
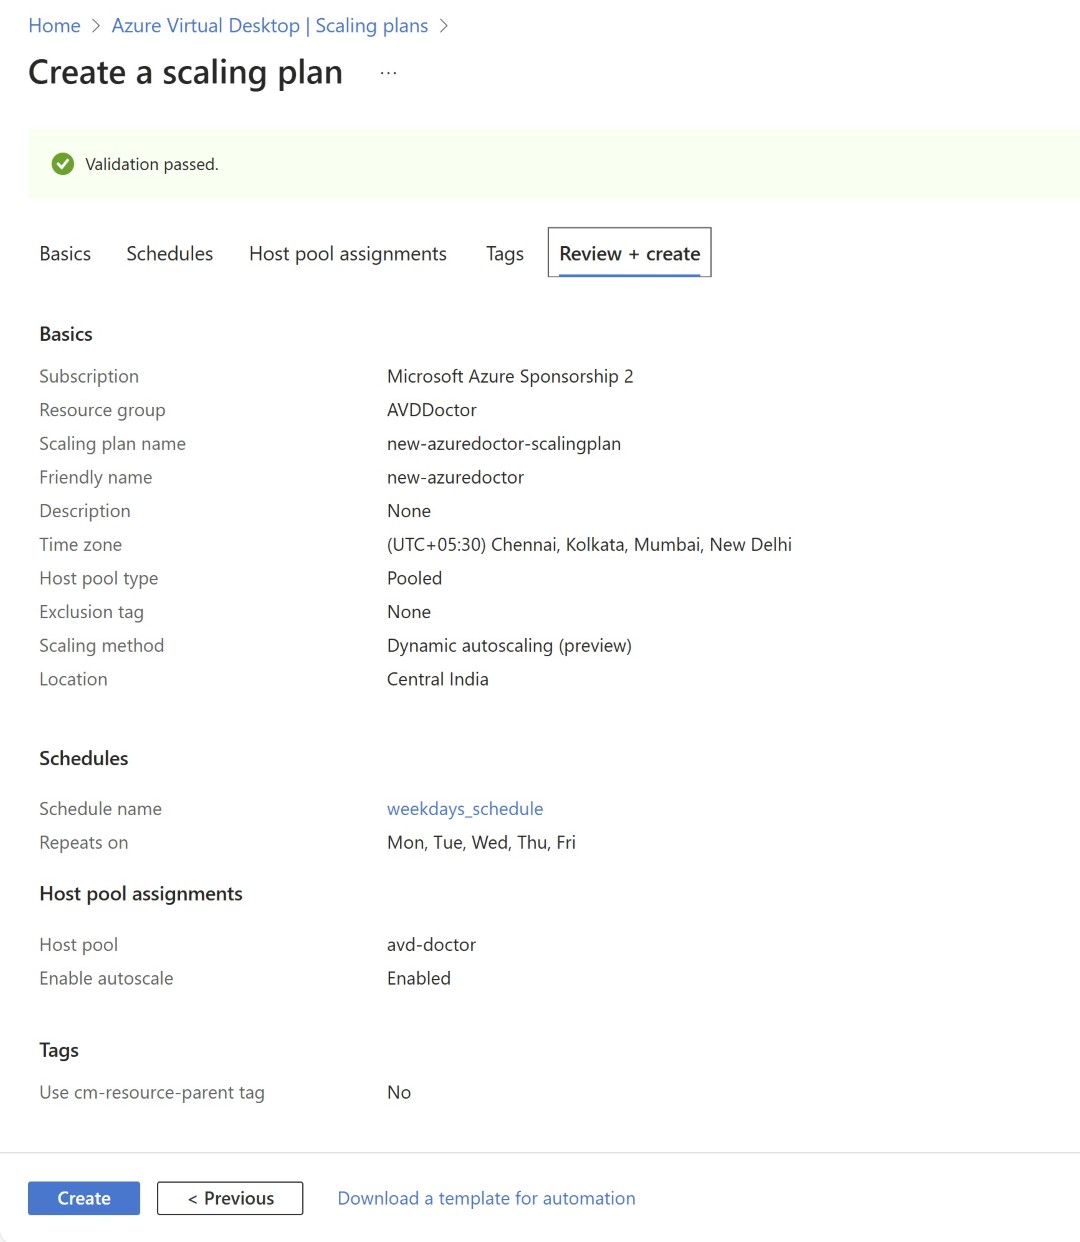
Let’s create auto-scale policy: Go to the scaling plans section in AVD and create the policy.
Select dynamic autoscaling
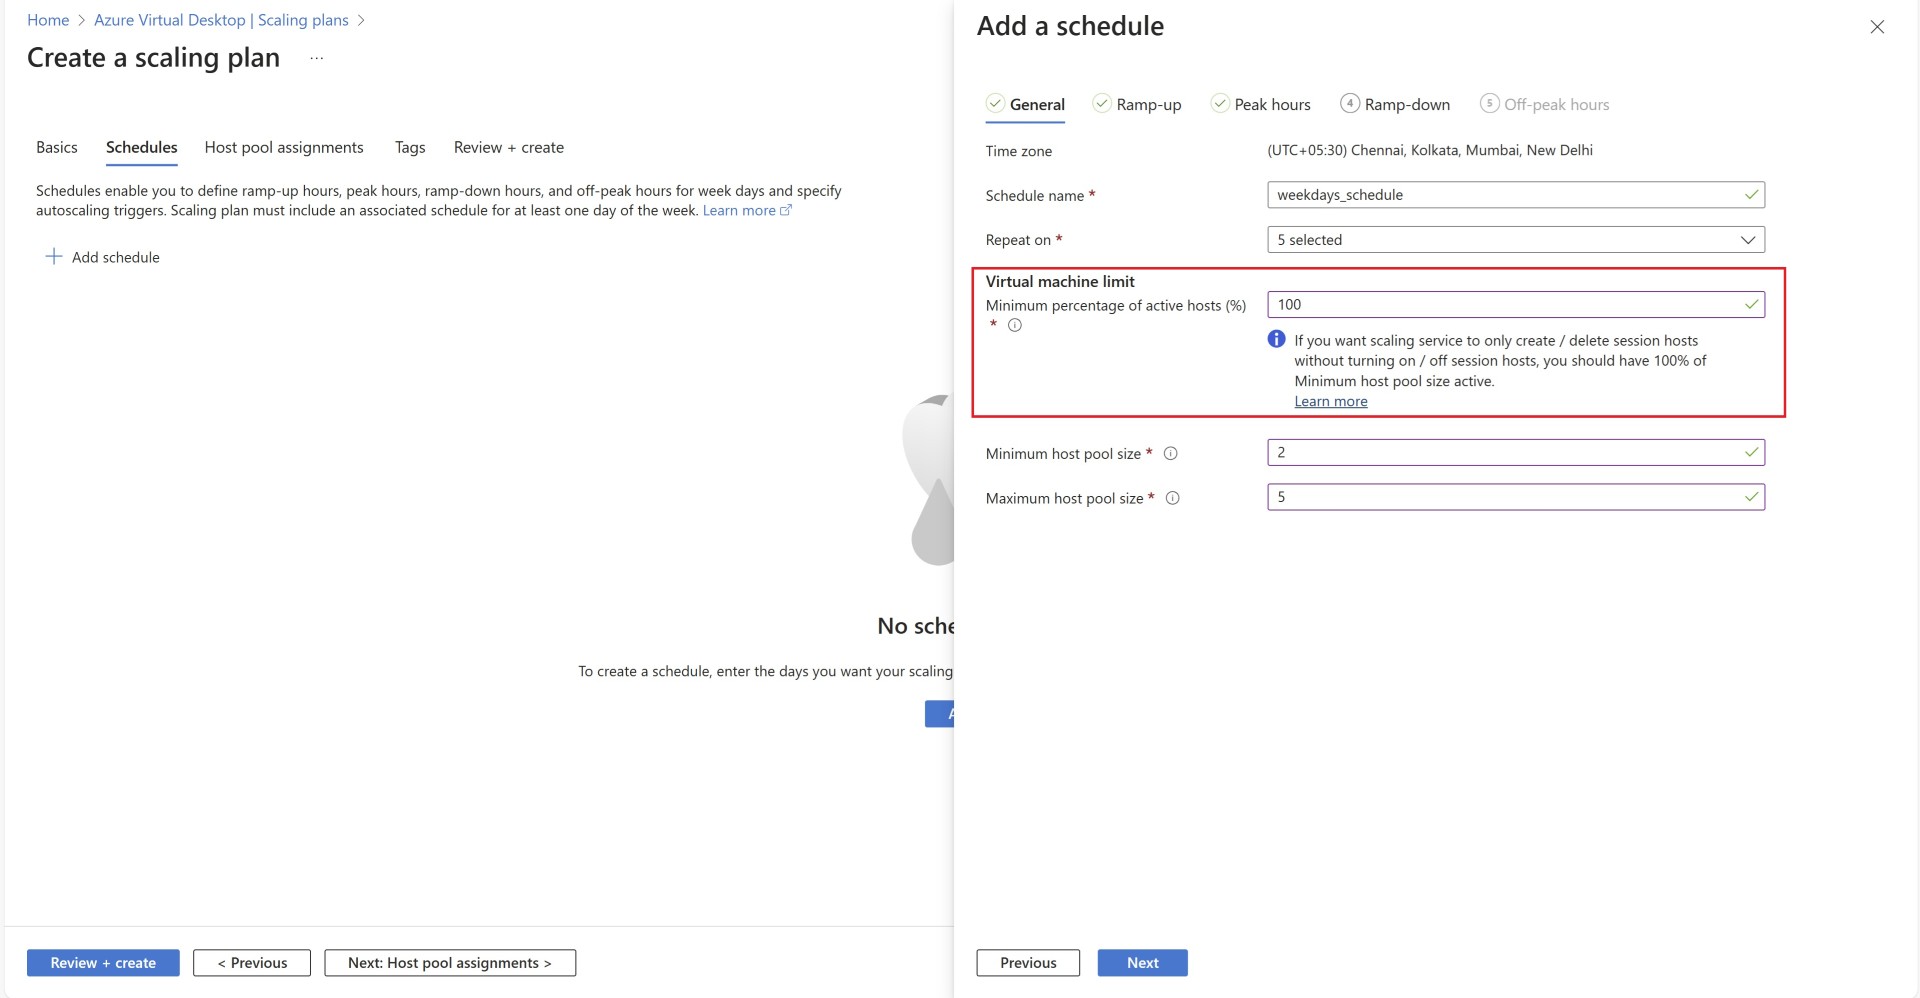
Here, you’ll need to specify 100% as the minimum number of active hosts so that they always stay turned on and rest of the VMs will get created/deleted based on the user traffic and schedule.
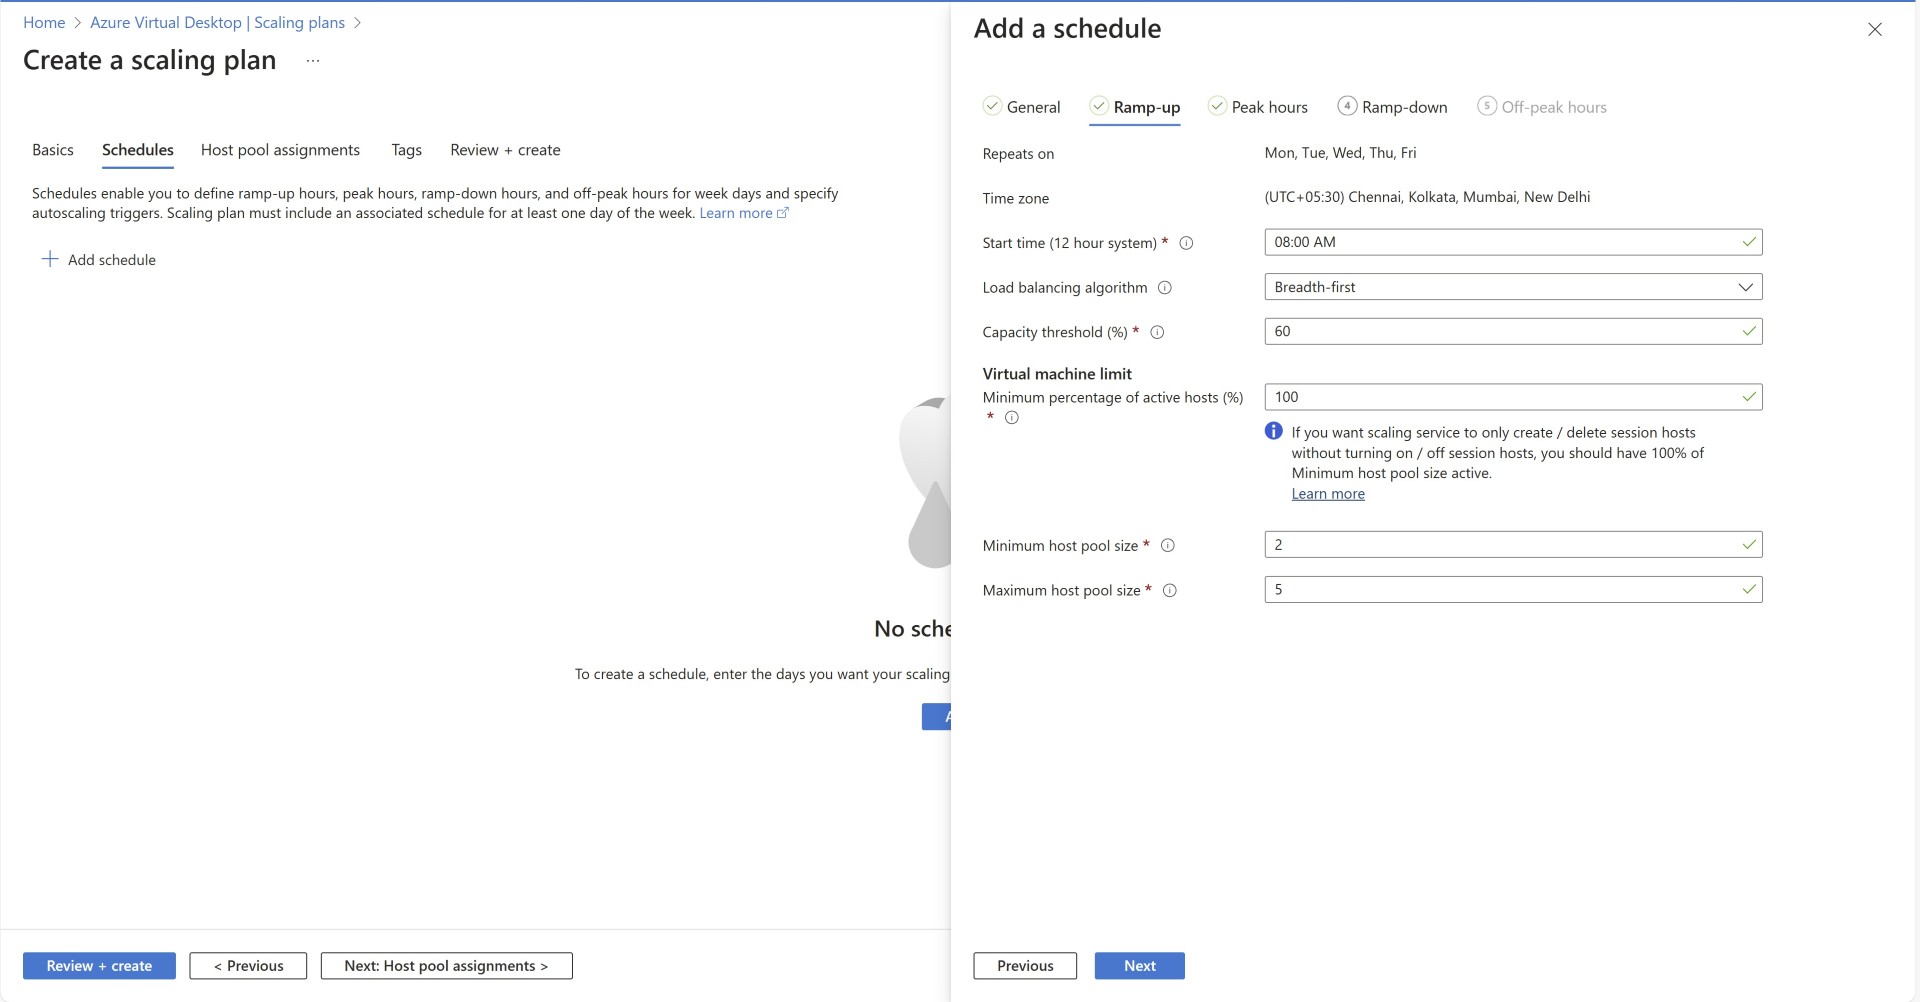
The rest of the settings are the same as the older auto-scale configuration.
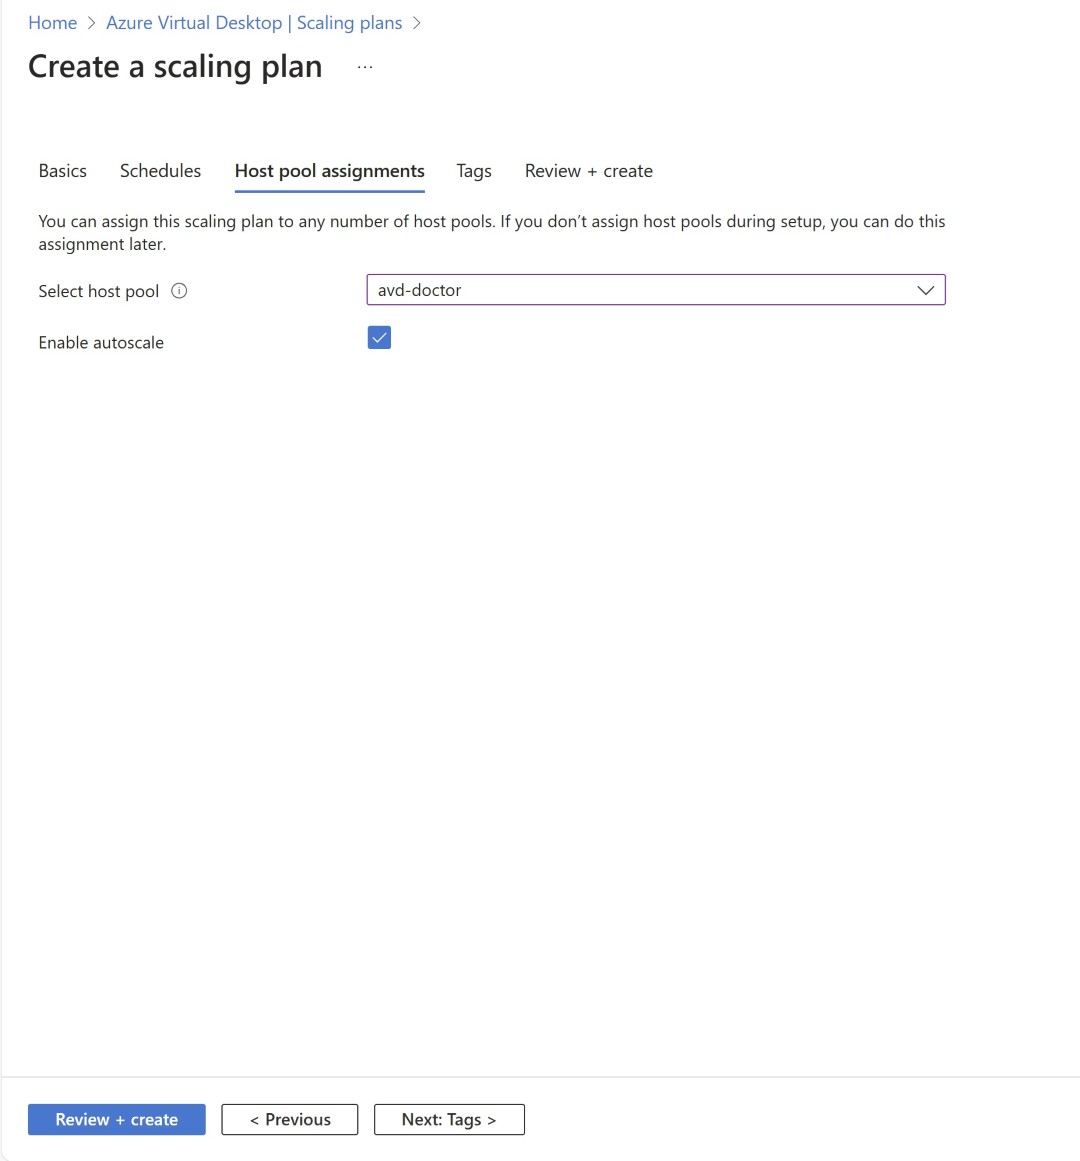
Select the host pool for this auto scale policy.
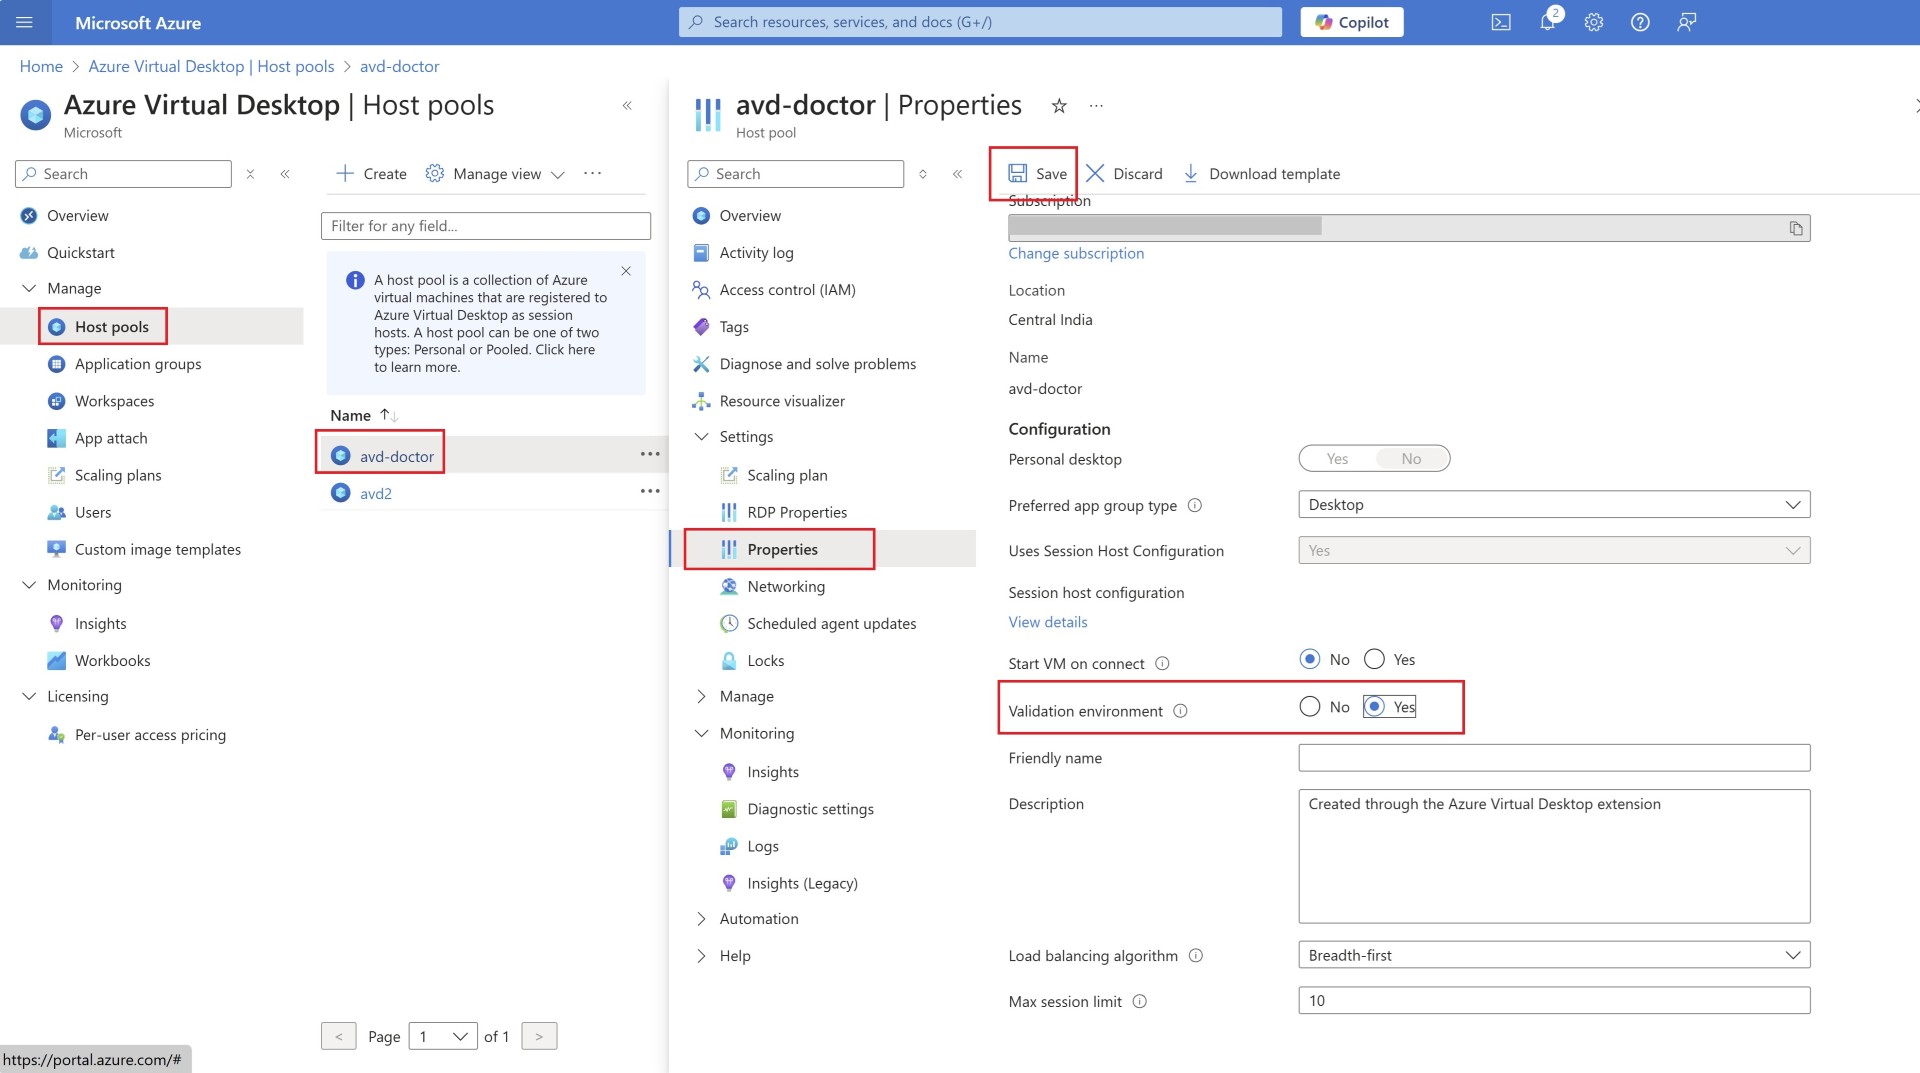
Make sure your host pool setting of validation environment turned on because this is preview feature.
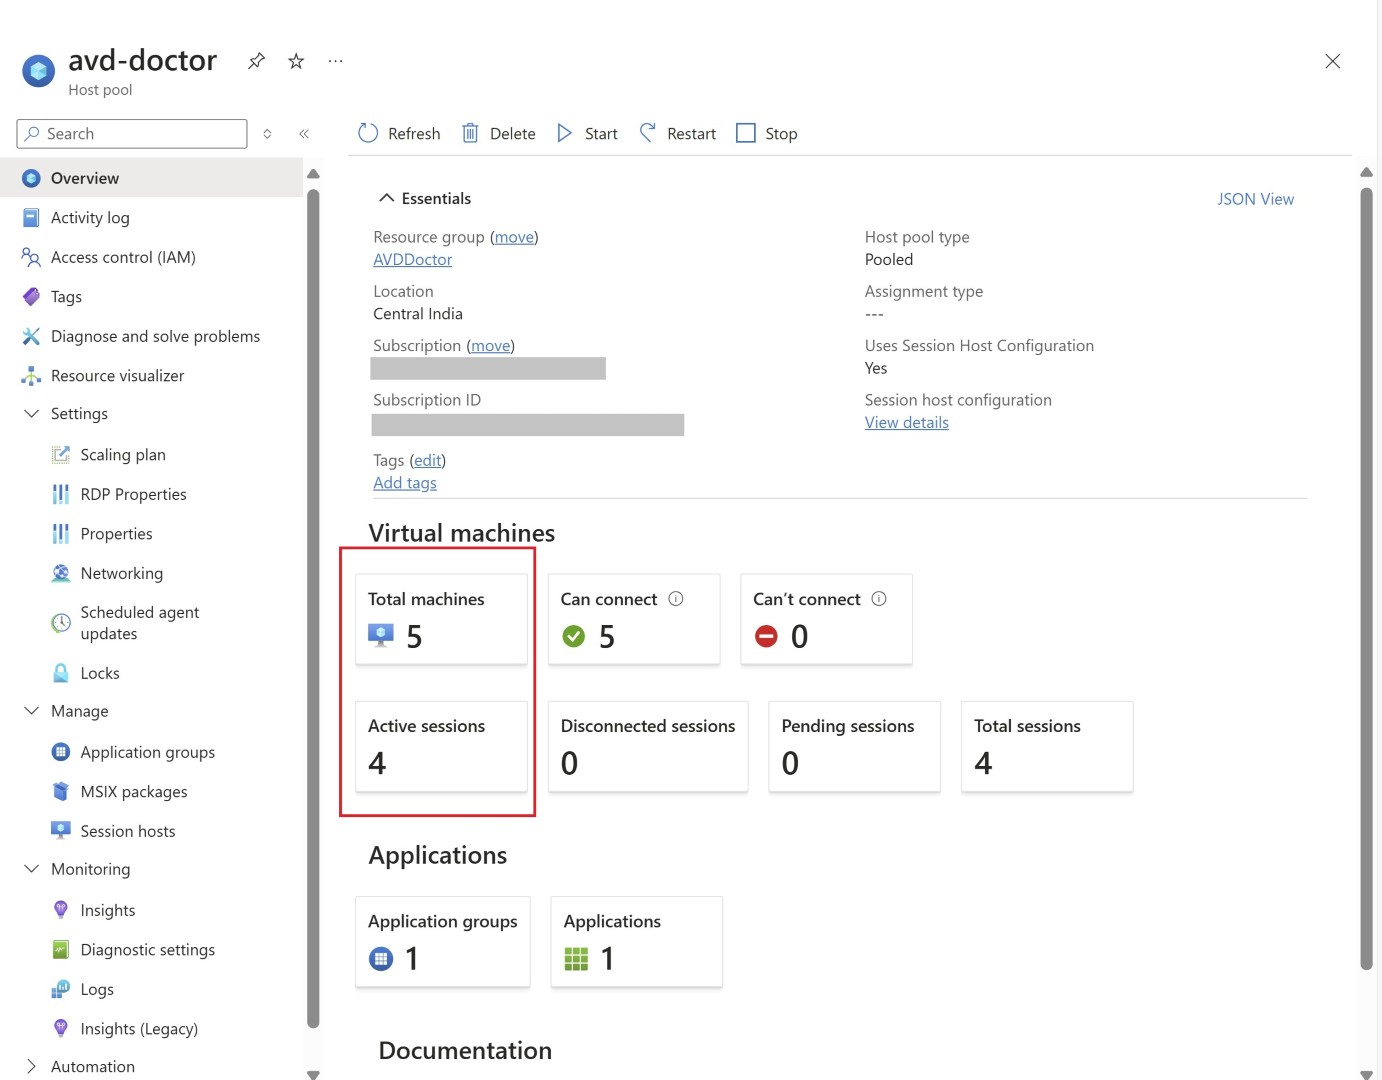
Once user logon and hit your capacity threshold then you’ll start seeing VMs getting created.
Please note: As these VMs are created on fly, you’ll need to have RBAC permissions at the subscription level assigned to AVD service principal, not on the RG because the autoscale policy won’t get triggered. Below RBAC roles are necessary to be assigned to AVD service principal.
Desktop Virtualization Power On Off Contributor
Desktop Virtualization Virtual Machine Contributor
Also if you notice the activity logs, you’ll see service principal of AVD creating the VMs
More info here:
If you want to know when autoscale will trigger you can refer below article
https://learn.microsoft.com/en-us/azure/virtual-desktop/autoscale-scenarios
In summary, the session host configuration and dynamic auto-scaling feature, along with the custom image template, strengthen AVD with core features for image updates and scaling. This will help administrators use AVD in cost effective way with less operational overhead.
Share the blogpost if you like it.
Happy learning
Subscribe to my newsletter for the latest posts and summaries. Your privacy is paramount, and your email stays with us securely. click the link to submit your email. https://forms.office.com/r/6ysKm4nkp4
