Convert Premium SSD to SSD v2 & Regional to Zonal VM
Overview of Disk: Azure has evolved from unmanaged disks, which were stored in storage accounts as page blobs, to ultra disks and Elastic SAN. There are multiple types of disks that can fit your needs. From Standard HDD for non-critical workload to Premium SSD Disk which will support production ready workload like SAP HANA Database. The latest type of disk is the Premium SSD v2.
You’ll find the differences between Premium SSD and Premium SSD v2 here.
https://learn.microsoft.com/en-us/azure/virtual-machines/disks-types#disk-type-comparison
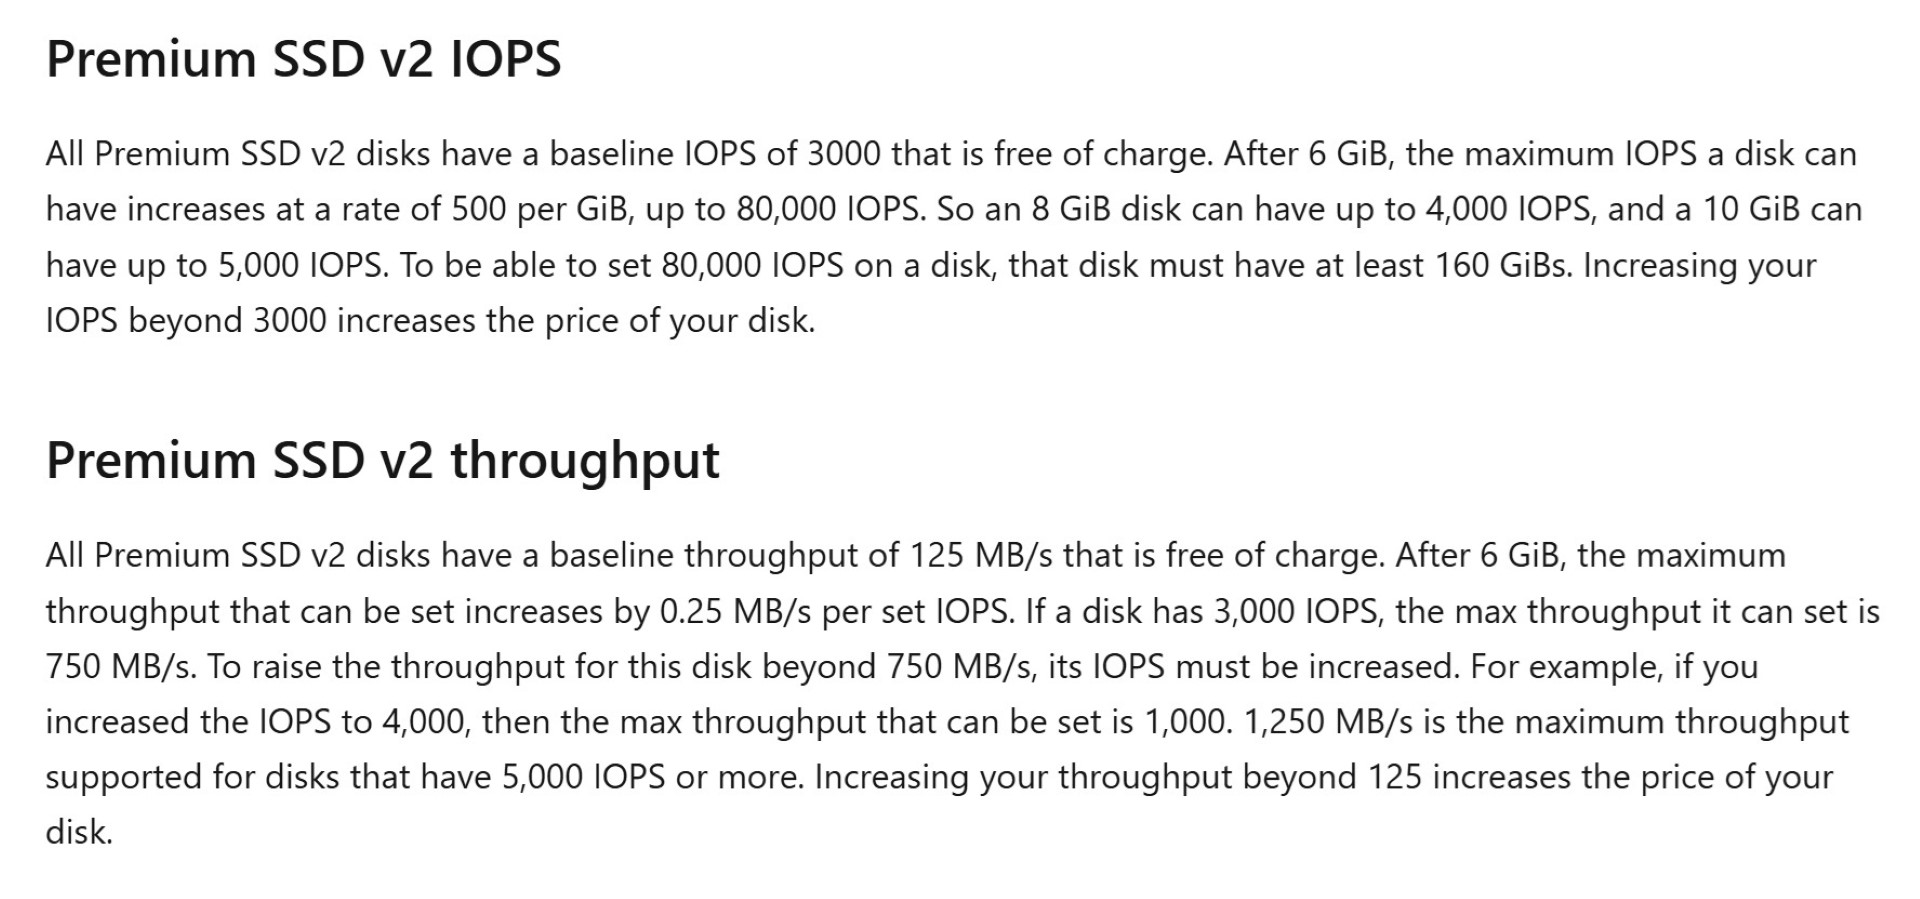
One of the differences is we can change the IOPS, throughput and size of the disk independently. This is not possible in Premium SSD. Below screenshot from MS learn document provides clarity of how IOPS and throughput can be increased and in what proportion.
Cost Savings:
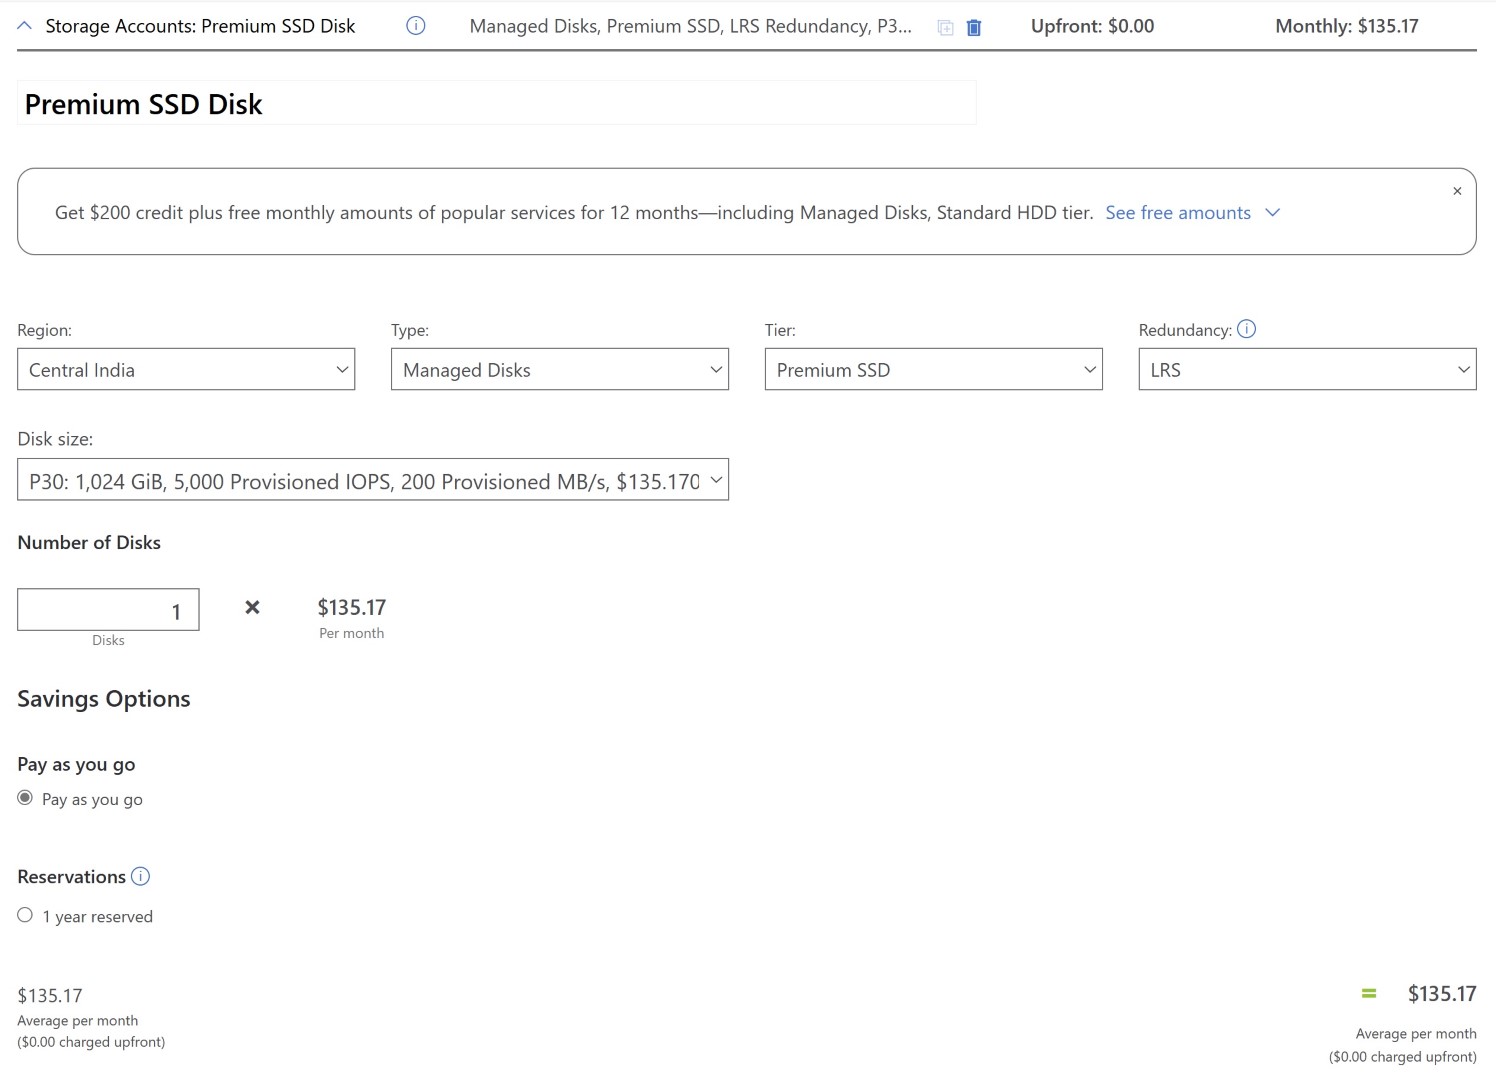
One of the biggest advantages of Premium SSD v2 is that it is cheaper than Premium SSD. Let’s find out how much cost you’ll save? Assuming you need 1 TB disk for your Database or Production VM. Below cost is of Premium SSD 1 TB P30 Disk. This provides 5000 IOPS and 200 MB/s Throughput.
Comparing the same price with Premium SSD v2, also adding 2000 IOPS and 75 MB/s Throughput
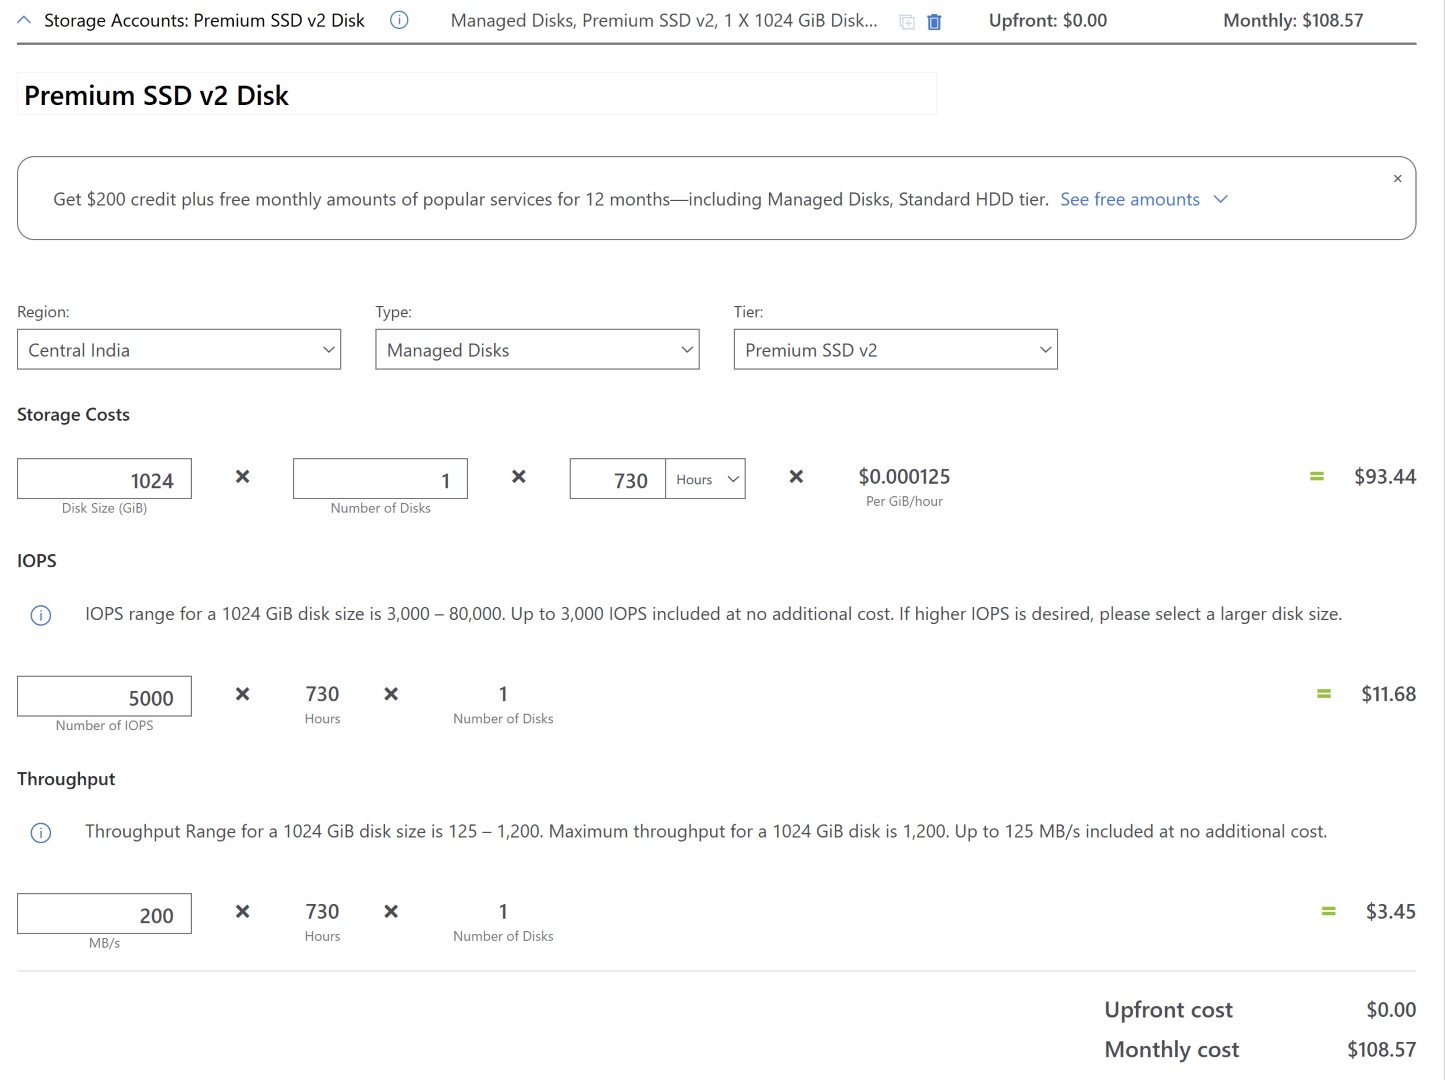
The difference is $38.28 per Month Assuming customers don’t need that much IOPS and Throughput and can work with the default IOPS which comes free with Premium SSD v2, below is the cost.
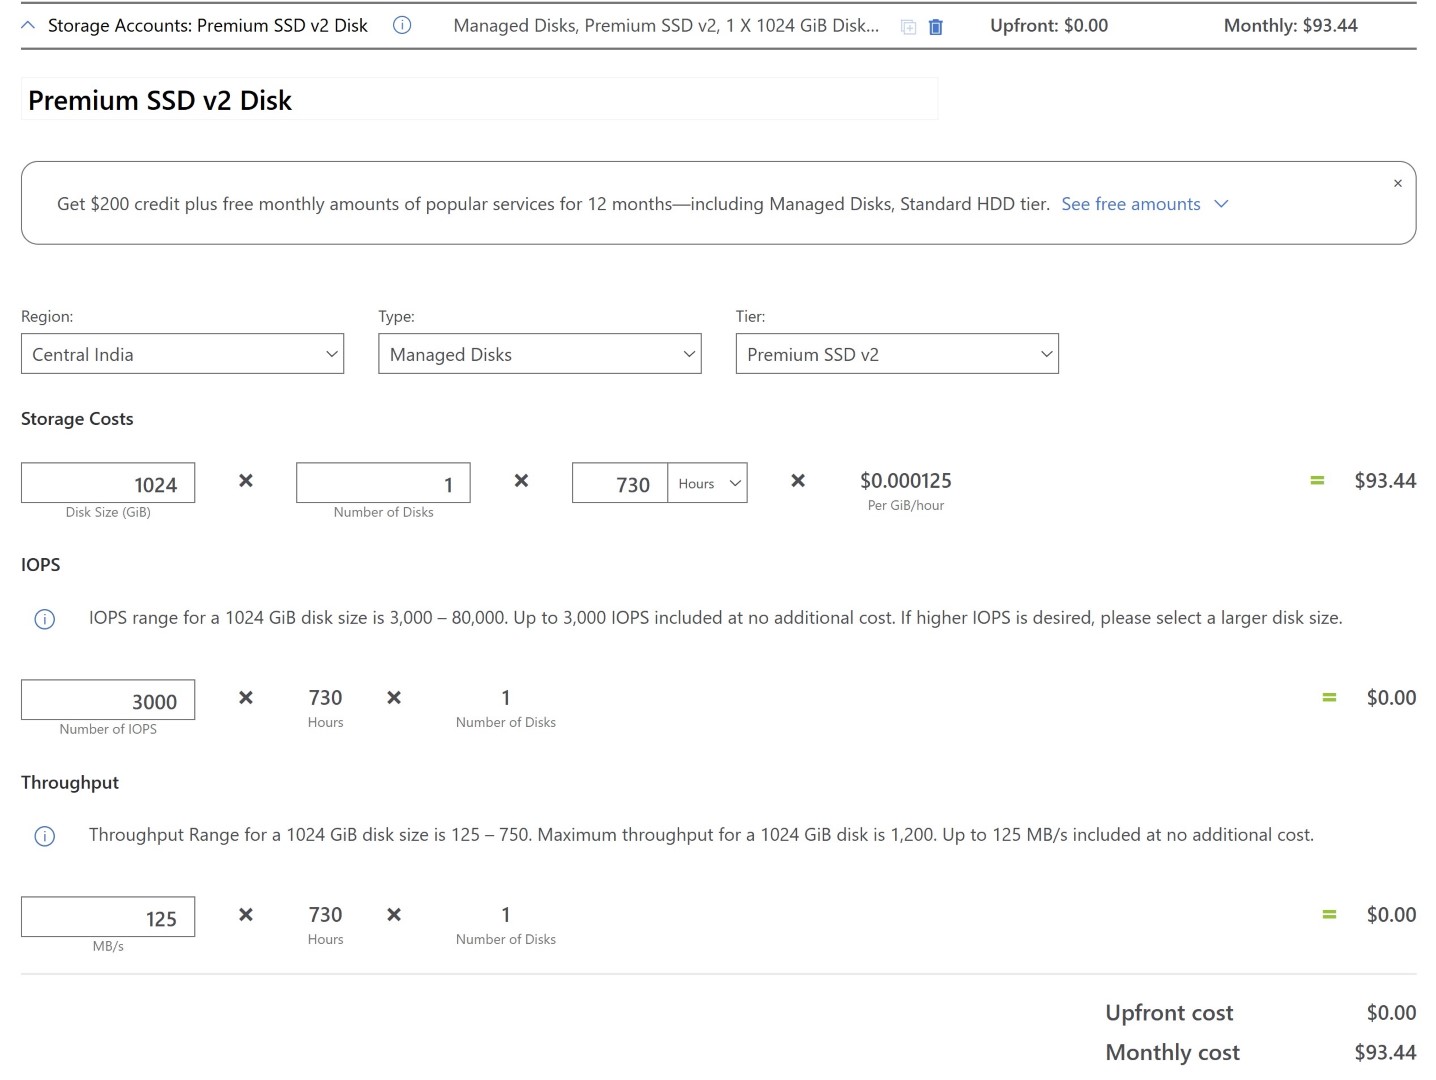
The difference is $41.73 per Month.
This is for 1 TB disk. Considering a larger set of environments, your cost optimization journey looks good with Premium SSD v2 😊
Hold on, there are limitations with this disk which you’ll have to keep in mind before migrating.
Limitations:
Before you convert your disk to Premium SSD v2, you should know the limitations. There are couple of them mentioned in the link below. Some of them are as follows:
• Your VM shouldn’t be regionally deployed, and it should be zonal VM. Premium SSD v2 can’t be attached when zone is not specified. You’ll need to convert your VM to zonal for this. This article will tell you how you can achieve this.
• Since the VM has to be zonal, you can’t attach it to VMs that are in an Availability Set.
• Azure Site recovery is in preview, so if your VM is in a production environment and you’ve ASR configured for DR then you’ll have to wait for this feature to go General Available.
Also please note there are a few considerations which you’ll have to keep in mind.
There are some regions where the paired regions or other regions in the same geography don’t have availability zone in it. Therefore, it doesn’t support Premium SSD v2 there. So when you’re thinking of selecting ASR you’ll need to find other regions which contain Availability zone. Also, it should have Premium SSD v2 support.
Second consideration is ASR used to be able to change the disk type from Premium SSD (Primary Region) to Standard SSD (DR region) However, if you have Premium SSD v2 in the primary region, then you’ll need to have Premium SSD v2 in the DR region too. You can’t change the disk type in DR region while you replicate it. As Premium SSD v2 is built very differently than Premium SSD. Hence this is currently not possible.
• Premium SSD v2 can’t act as an OS disk. It can only be used as a data disk.
https://learn.microsoft.com/en-us/azure/virtual-machines/disks-types#premium-ssd-v2-limitations
Assume you’ve gone through above all the information of what is Premium SSD v2 and limitations associated with it, and you’ve made the decision to migrate. There are two procedures to it.
A) You’ll need to convert your VM to a zonal VM.
B) Convert your disk to premium SSD v2
If your VM is already zonal VM then you can jump to the procedure B.
Convert your VM to Zonal VM:
Zone conversion is not a new process. There are PowerShell scripts which will achieve the same. Below article from Umesh Panwar easily accomplishes through Azure CLI.
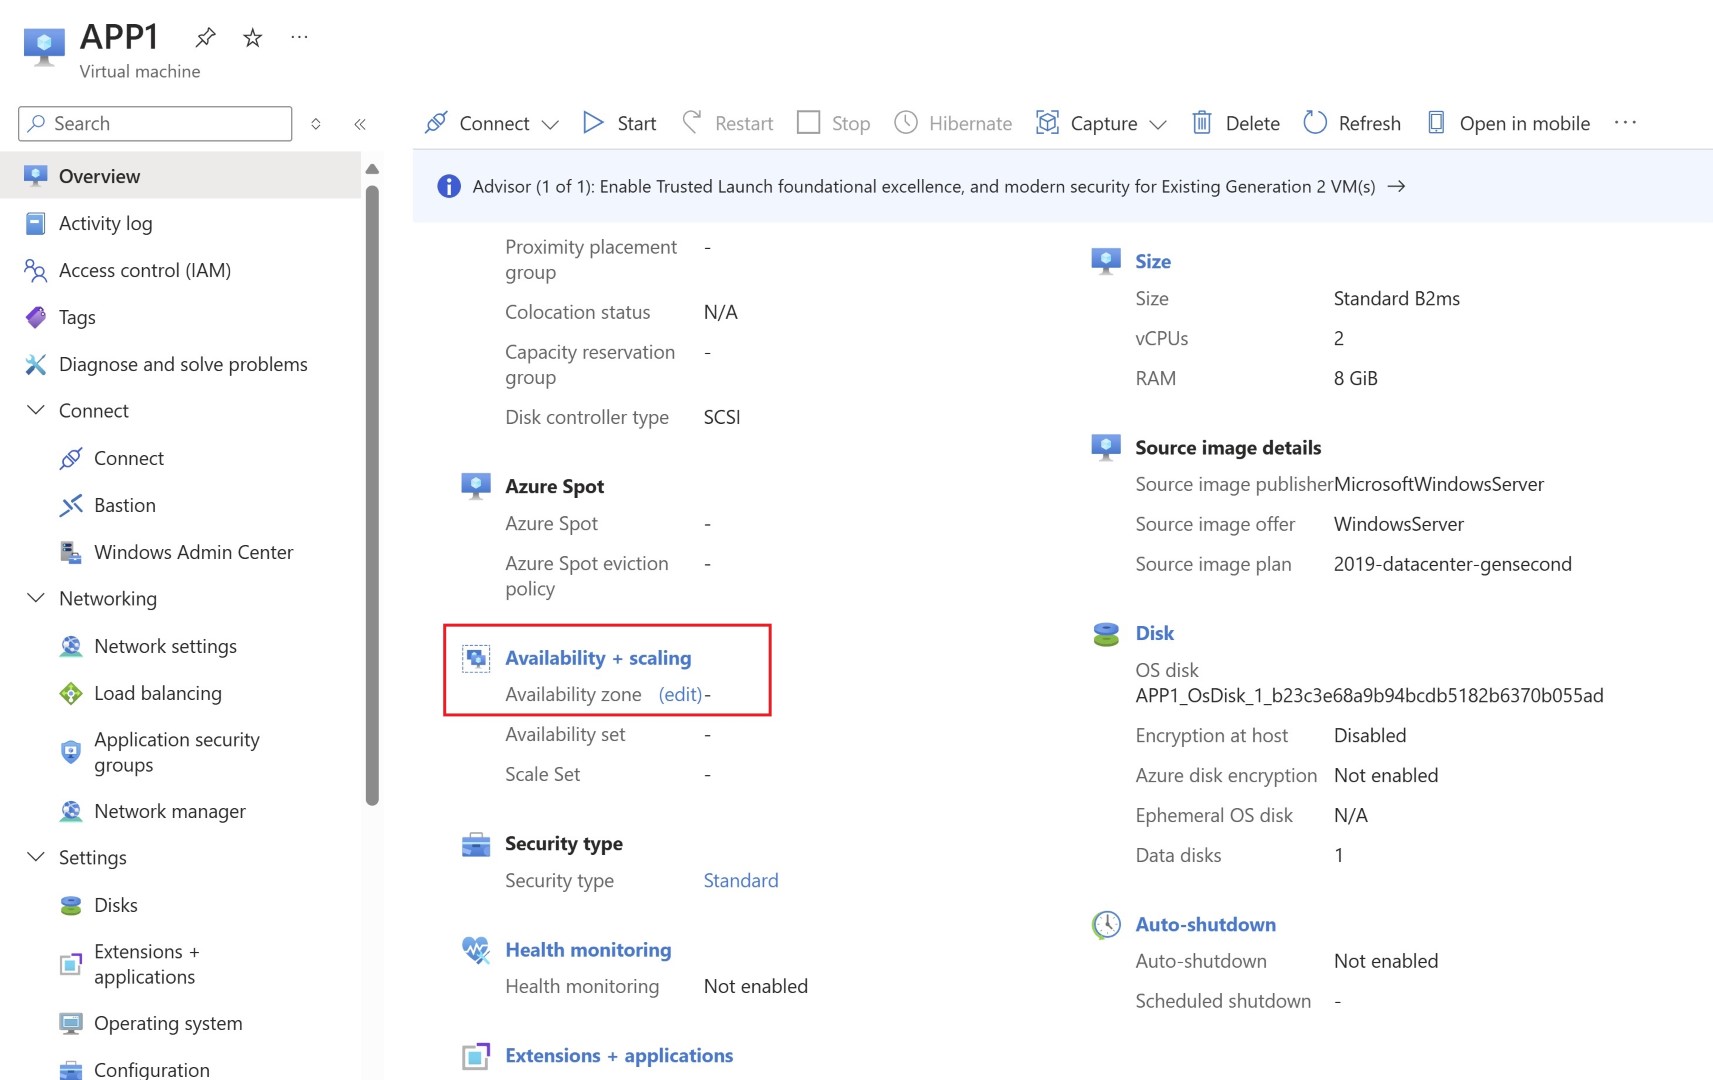
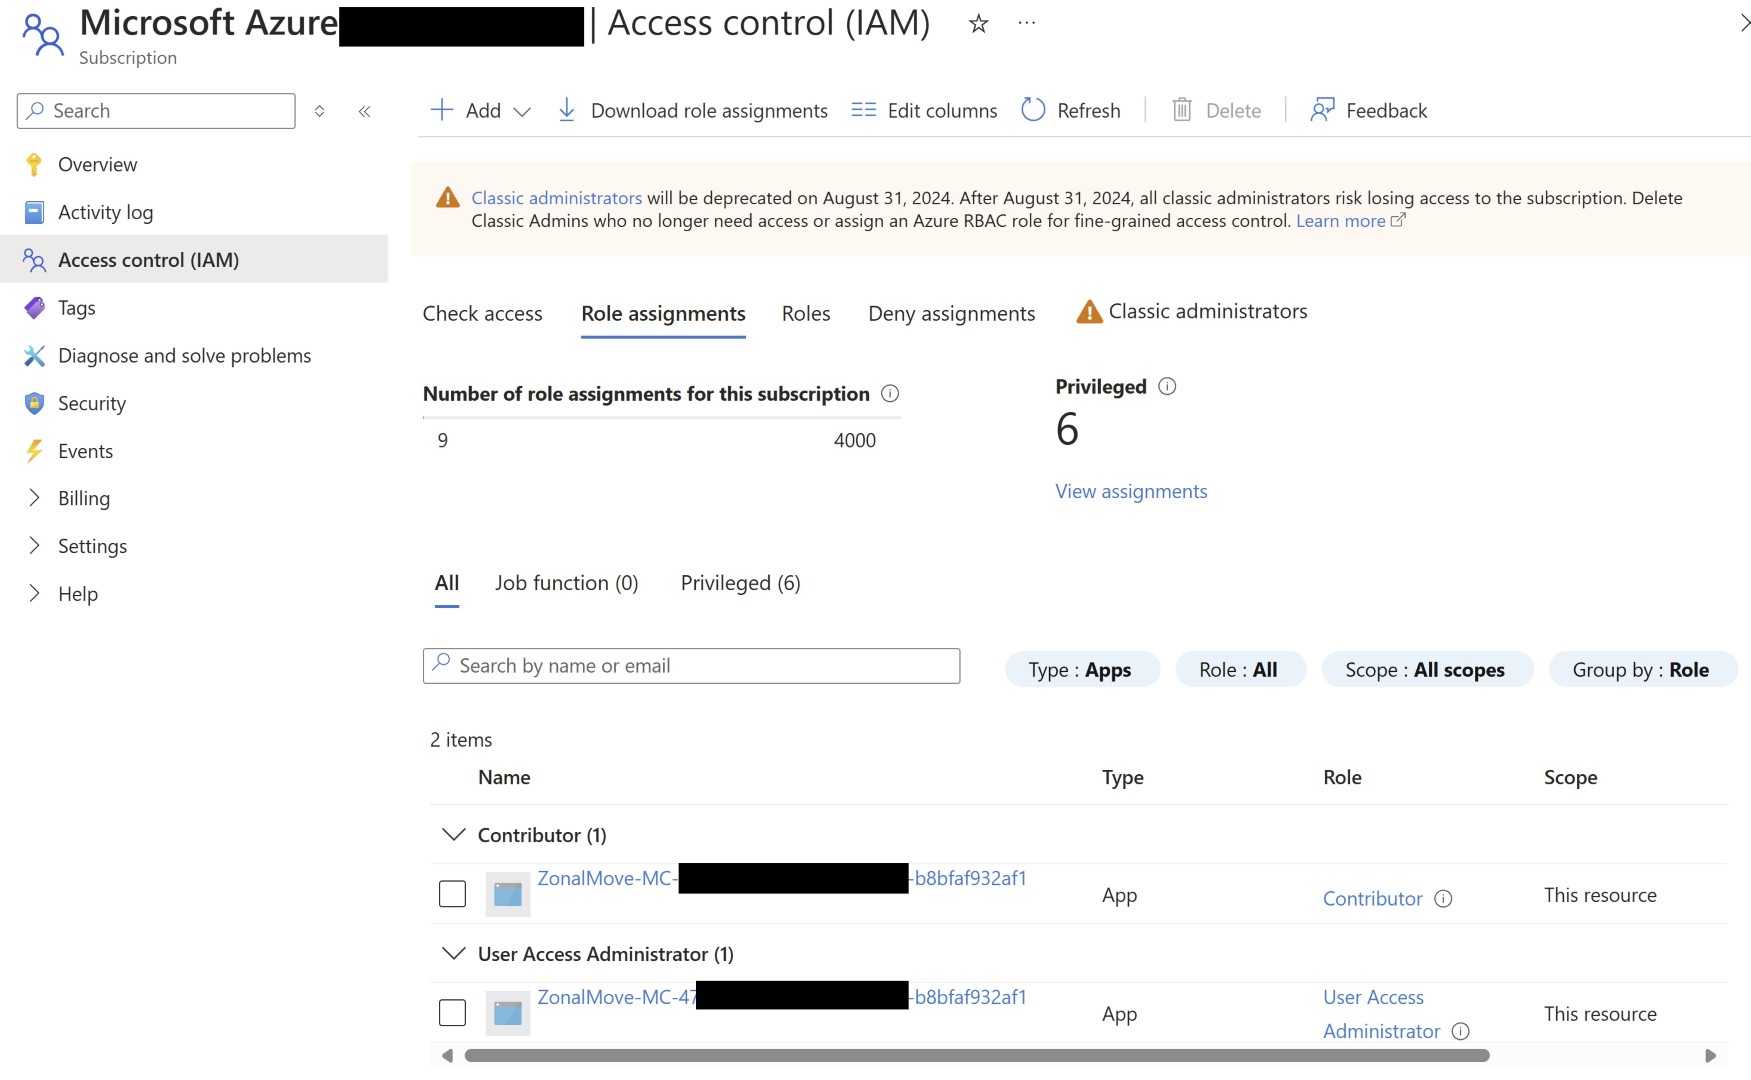
Portal Method: Another way is to perform this action through portal, When you go to overview screen of Azure VM. scroll down to find whether you have a zonal VM or regional VM. The new feature now has got Edit button. There is a system assigned managed identity which gets created and gets two permissions User access administrator and contributor on the subscription. This will get assigned the first time you click on edit button of the zone. Also, you need to make sure you’re doing this step with owner permission role.
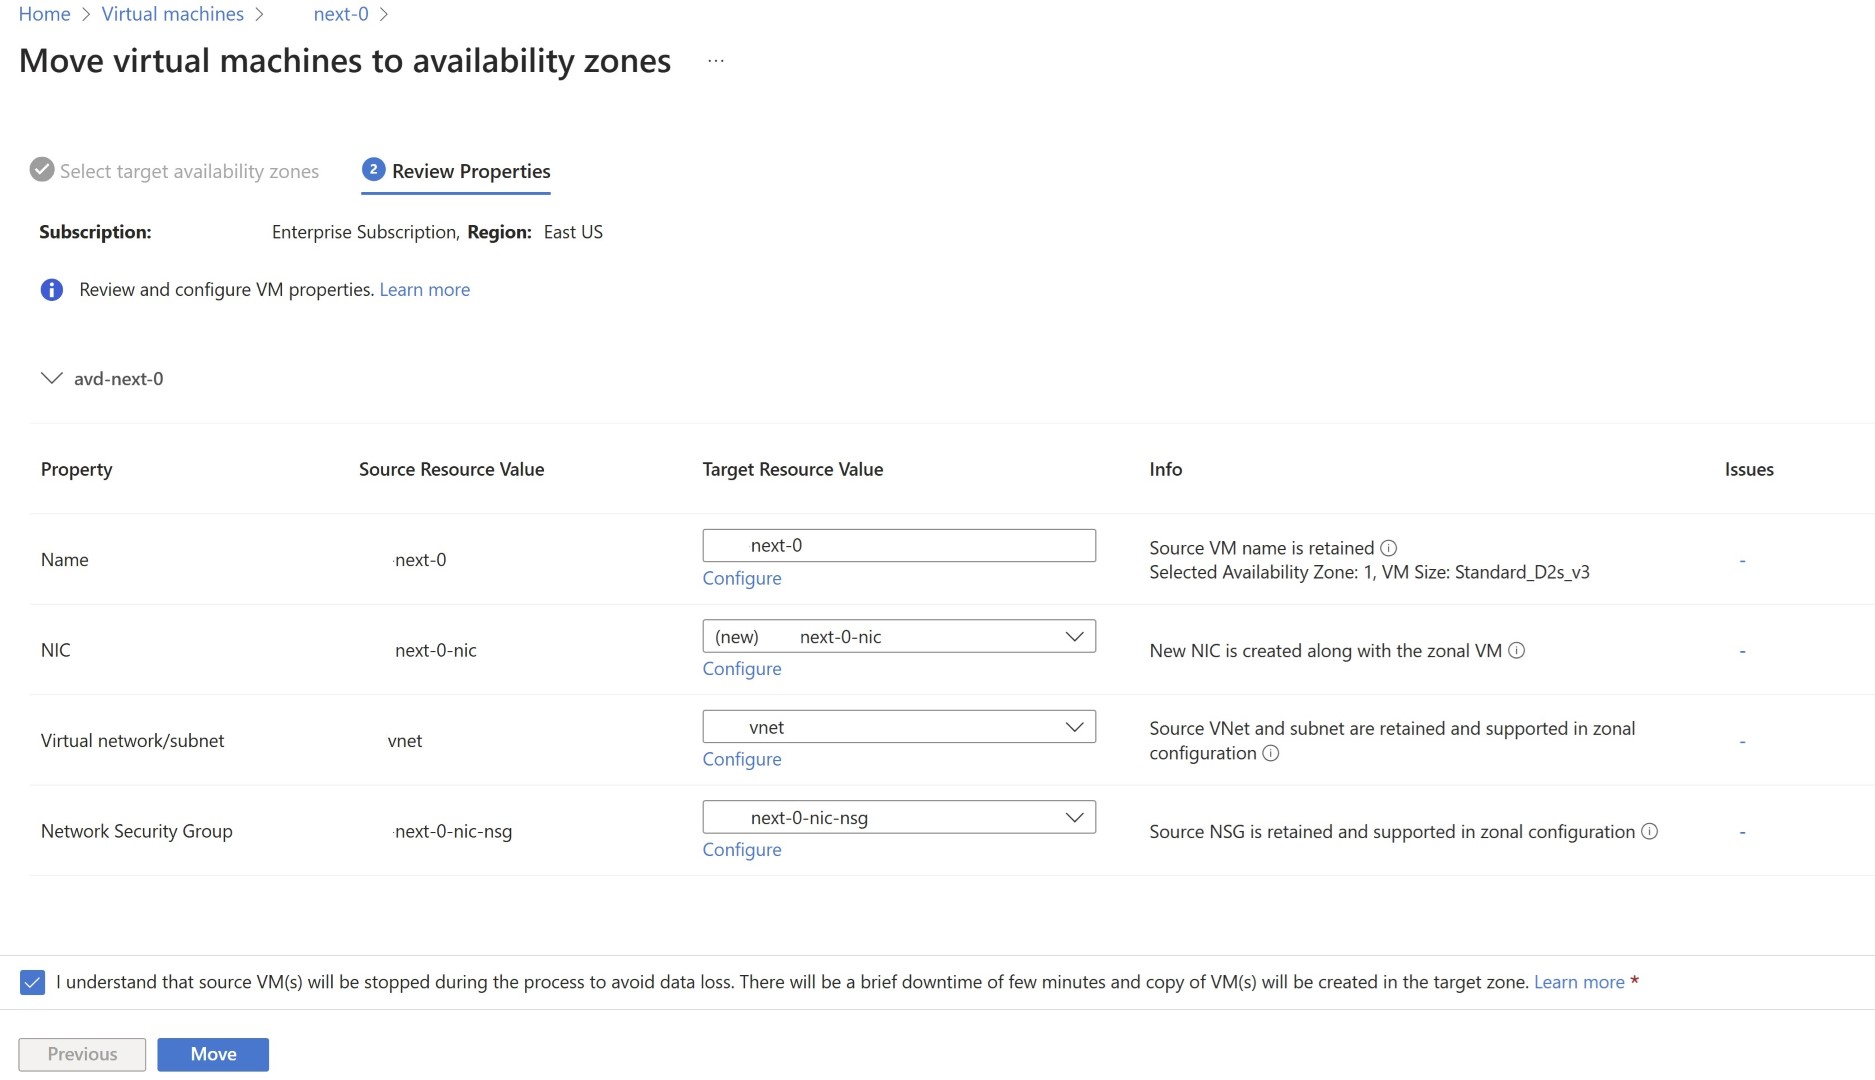
The migration screen will open up.
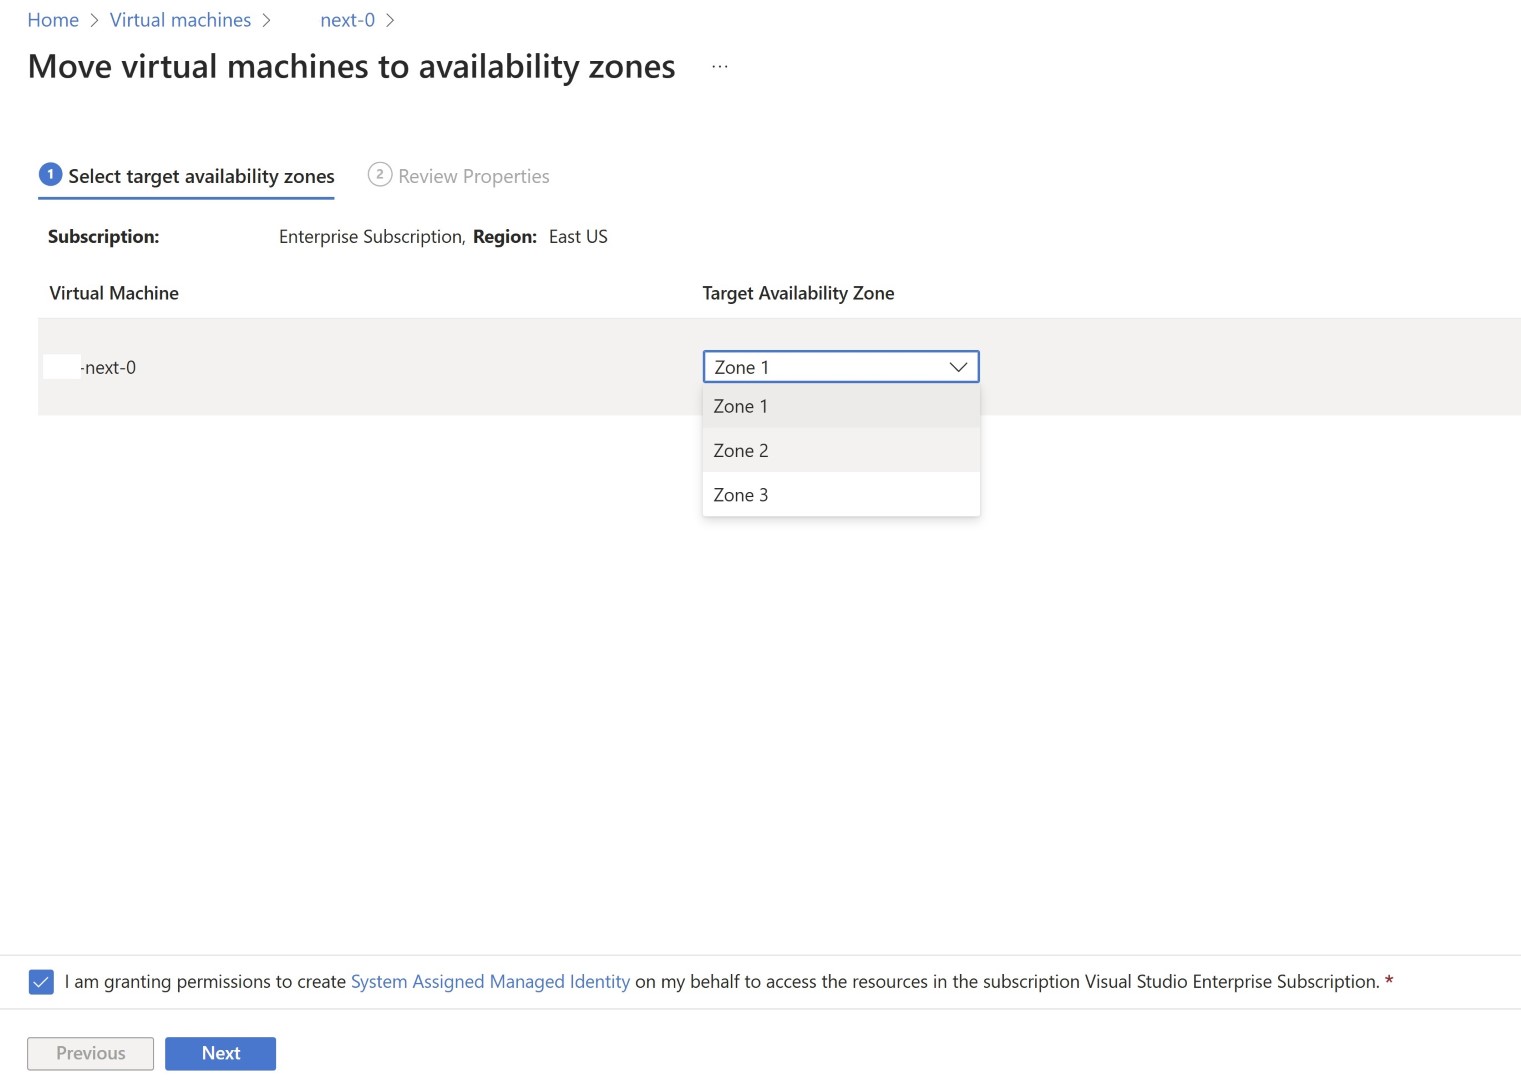
Now in this stage, the system assigned managed identity gets created and assigned to subscription.
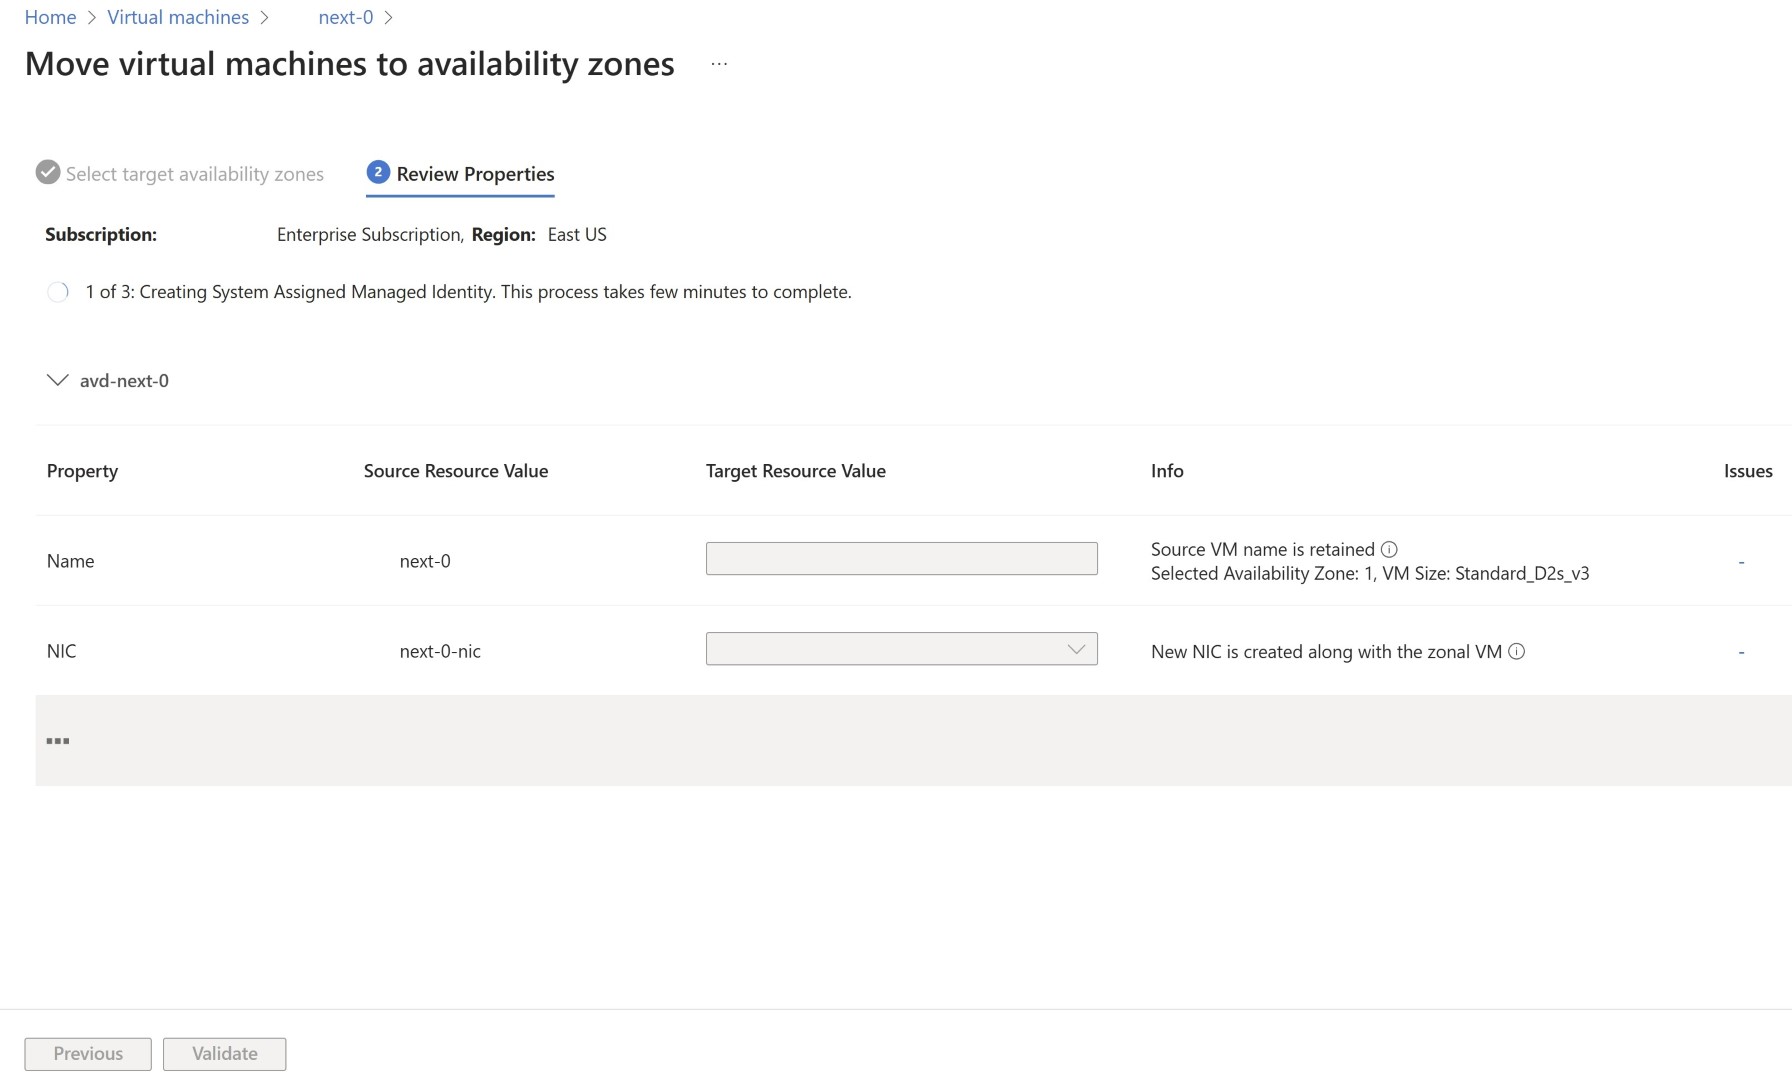
As part of the move, a snapshot of the existing disk is created, and then a new VM in the specified zone is created. A new NIC will be created and we can’t use existing NIC, once a new NIC is created you can goto existing VM and change the IP to a different IP address which is available and go to new VM and change the IP to the orignal IP Address.
Below article will show detailed pre-requisite of the process. If you’ve a VM with direct Public IP or a VM which is associated to a Load balancer then you should refer this link. It’ll show what happens to LB and Public IP association.
Convert Disk to Premium SSD v2:
Assuming you’ve now converted VM to zonal VM. Now let’s talk about disk conversion from Premium SSD to Premium SSD v2. Previous method of migrating from Premium SSD to Premium SSD v2 is snapshot based. Basically, you take a snapshot and then create a Premium SSD v2 from that snapshot, just like how you create a disk from snapshots. Very well explained in below article.
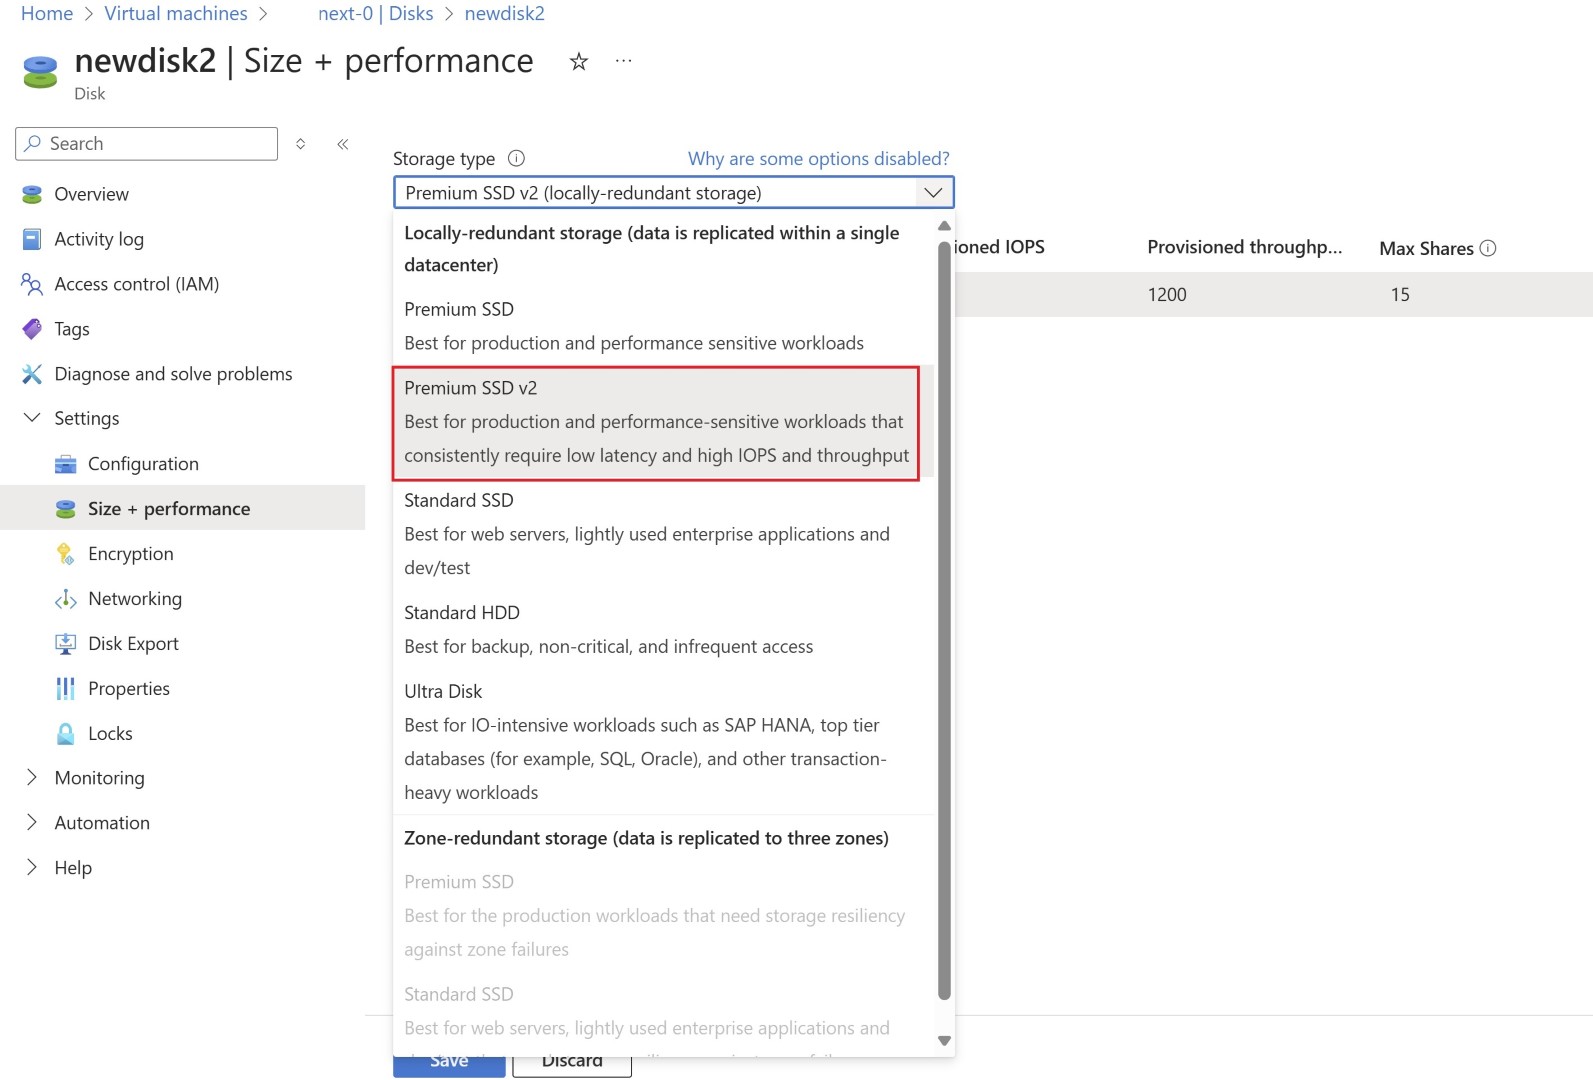
This is not seamless and hence Disk Product team has introduced new feature of directly converting disk from Premium SSD to Premium SSD v2. This is currently limited to certain regions. To change the disk tier, you’ll need to stop and deallocate the VMs.
And change the disk tier just like how you convert your VMs from Standard SSD to Premium Disk. Similarly now you’ll have to select Premium SSD v2 instead. This is simpler than the snapshot based method.

Cleanup:
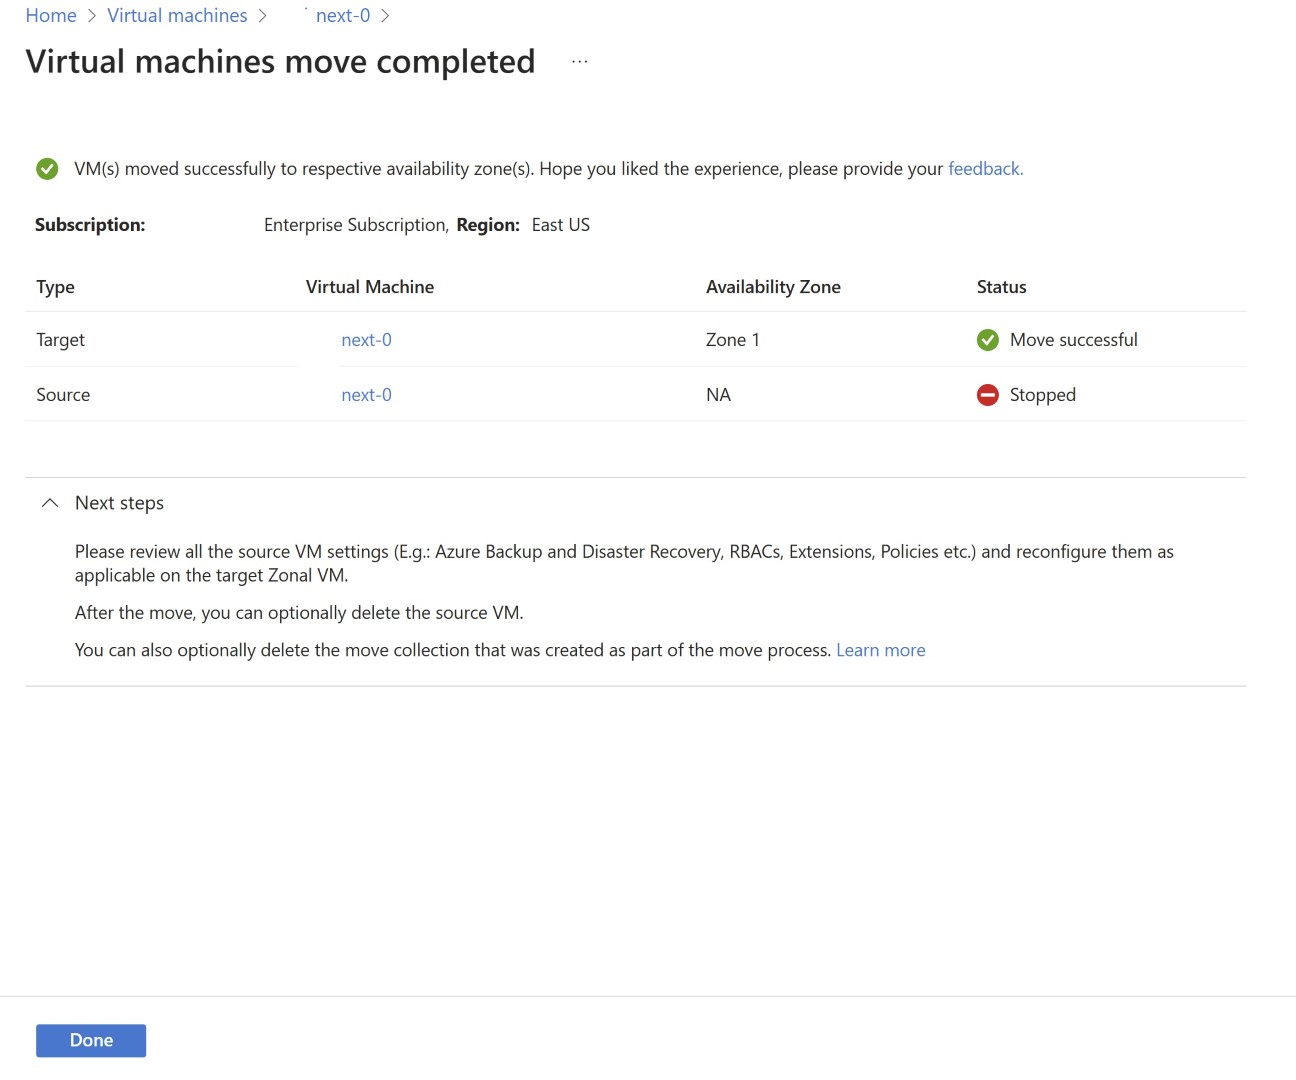
Once you successfully convert your VM to zonal VM. You’ll need to delete the existing VM as it’s in a shutdown state and disks are associated with it. You’ll still be billed for resource.
I hope above details will help you save cost by converting disk to Premium SSD v2 and also new method to change the VM from regional to Zonal.
Happy Learning!
Subscribe to my biweekly newsletter for the latest posts and summaries. Your privacy is paramount, and your email stays with us securely. click the link to submit your email. https://forms.office.com/r/6ysKm4nkp4